


28 July 2022
|
It's rare to see a model railway without trees, especially if you’re modelling a UK location. Here's our beginner's guide to get the most out of these scenic additions.
It’s a bare landscape without trees and unrealistic, too, especially if you’re modelling British countryside. Things don’t look so quaint or picture-perfect either. Trees add height to a layout, and are great for hiding imperfections, or disguising joins in the backscene.
Where can I buy model trees?

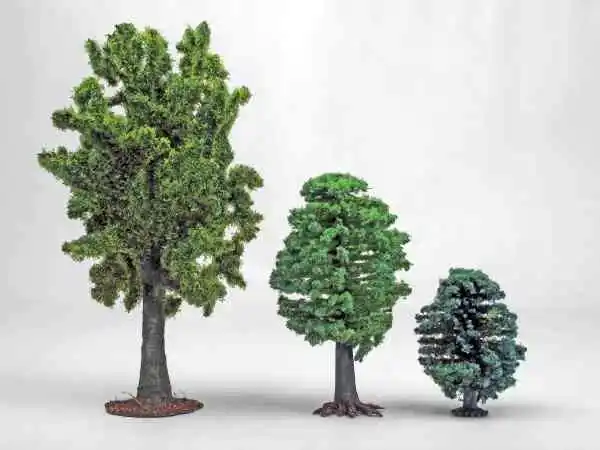
Ready-made models of trees have come a long way in the last decade – many now look much better from the box. There are a growing number of model tree manufacturers, with larger suppliers like Faller, Gaugemaster, Heki, Hornby Skalescenics and Woodland Scenics retailing bumper bags. These usually represent good value.
Ready-made trees come in many shapes and sizes, not dissimilar to trees in the natural world, making modelling a scene easier. From conifers and oak trees to deciduous trees, weeping willows and pine trees, most common species are covered, you can even buy snow-covered trees.
Many 'off-the-shelf' trees from manufacturers can often be improved with a little modification to look more realistic.
Improving ready-to-plant model trees
Model trees from the packet can look too uniform in shape and are characterless. Here are some tips to make them look more authentic.
- The boles of smaller plastic trees are too shiny and don’t look realistic. Use a rough file to mark the surface with score marks to form a textured and matt surface. Use the end of the file to gouge out furrows at the base of the tree to match the roots.
- Snip roots off with side cutters and, using a rough square file, create fissures into the boles. Don’t remove too many roots, or the tree won't stand without additional support.
- Use a stout pair of scissors or side cutters to attack the foliage to add variety. You could add scenic glue and reapply the off-cuts to other areas of the tree to help break up the uniform appearance, too.
- Some bundles of trees tend to be the same height and the trunks can sometimes be too wide for the height. Cut the base off with side cutters and whittle the trunk to a taper for easy planting.
- Paint the trunks with grey and brown matt acrylics – there are many shades in the trunks of trees, so use several colours, plus add a spatter of yellow and green tones to depict moss and lichen.
- The trunks of trees are also often greener than we think, so add this using an airbrush or weathering powders.
Which trees do I add to a model railway and how many do I need?

When it comes to model trees for your layout, the possibilities are endless, an apple orchard? A majestic oak in a field? An ornate cherry tree in a front garden?
The first step is to look around for inspiration. If your model railway is based on a location, look at photographs for the height and spread of trees, especially if you are depicting a certain period in time.
Seasonality also needs to be considered, some trees look different in autumn versus spring.
It is easy to think that all trees are the same, but that's a gross simplification. However, to avoid complexity, we can take shortcuts. For example, when modelling the canopy of leaves, if there are a group of trees together, it is enough to simply vary the height and colour of the trees without having to worry about what they are. Give more attention to trees at the front of the layout and signature species that help define the area that you're modelling.
Related: For more on modelling different varieties of trees – read our guide here.
How to add trees to your model railway
Here is a useful video explaining the planting of trees on a layout:
Wood and forest floors

If you’re modelling a solo tree, adding scatter material or static grass is usually enough to give a ‘bedded in’ look. If you’ve modelled a copse, or wood, the area surrounding the roots will need more work to model leaves or pine needles, berries/fruits/nuts and branches in various stages of decomposition.
A variety of scatter materials are available from suppliers, which will help.
Making model trees
Many modellers make their own trees for realism. The usual method of construction is to use many strands of wire, twisting one end together to create a trunk. Then it is a case of twisting and separating wires to create the desired effect – as seen below.

There are several methods at this point, some use artificial hair to replicate branches, others use seafoam or other natural materials, while others opt for ready-made foliage or even sponges. Scatter material is usually applied last to add density and further variety and realism.
To make the trunks and branches authentic, applying PVA and sawdust is a method we have used before, followed by painting a variety of greys and browns as detailed for the ready-to-plant trees. Again, a variety of methods can be used for the larger trunks, some use latex rubber, others old wooden paint brushes.

Related: Read our guide on how to model a deciduous tree here for tips, plus there's a wealth of advice and different approaches available to view on RMweb.
More information
Looking to model seasons? See the below guides to help you capture the look.
More useful guides
Looking for more advice on adding lineside variety to your model railway - our guide explains all.
If you're thinking of tackling water on your layout? Our guide on how to model water here should be your first port of call.
Need more advice? Take a look at the BRM Techniques page for all our latest guides and advice articles.
