Direct Rail Services’ English Electric Type 2s never fail to turn heads because of their extensive modifications. By 1999, DRS had 15 modified Class 20s on its books: 20301 to 20315 inclusive.
Modifications included external long-range fuel tanks, new WIPAC light clusters and reinforced cab windows. Eventually the fleet received DRS’ multiple working sockets, mounted in triangular fixtures that gave the locomotives their distinctive ‘noses’.
All locomotives gradually received the latest ‘Compass’ livery, though some were sold or scrapped before repainting. The last three active members of the fleet – 20302, 20303 and 20305 – see use for a few months each year on the York-based RHTT (Rail Head Treatment Train) circuits; this year reportedly being their last. Many differences between locomotives exist, including 20303 Max Joule 1958 – 1999, with one nameplate unusually residing on the cab front. This oddity persuaded me to model the locomotive in its current state.
For railway modellers, the main RTR manufacturers have been reluctant to produce the sub-class. This allowed accessory manufacturer Shawplan to develop an extensive range of etches to aid the modeller.
After many years of wishlisting, Bachmann announced it will produce the Class 20/3 sub-class, 20 years since its introduction. In the meantime, Class 20 models from Bachmann or Hornby can be acquired for little and combined with etched parts to produce distinctive models.
1
Any donor model from Hornby or Bachmann will do. Bachmann’s model is the most detailed, and this general release of 20217 in BR Blue livery was acquired second-hand. The model can now be disassembled, carefully prizing out all removable details with a screwdriver.
2
Modifications began by using a sharp craft knife. All raised detail on each end was removed, leaving a small amount of material for sanding smooth. Any recesses and holes were filled with Squadron Products White Putty, using an old screwdriver to spread the putty.
3
Pieces of styrene can also be superglued in larger holes, such as in the recess left by the nose end headcode panel. All bufferbeam detail (except coupling mount) was flattened to allow a blank canvas for new parts. The Bachmann roof grille surround was superglued in place to provide a base for the replacement.
4
Having hardened overnight, the filler/styrene can be sanded smooth. After careful rough filing, 240 grit abrasive was used, followed by 1200 grit to achieve a smooth surface. The model and surrounding area should then be cleaned thoroughly to avoid dust inhalation and surface contamination for further work.
5
The new roof grille mesh is extremely fine. It was positioned and held with Tamiya low-tack masking tape, then superglued around the edge. The frame was bent to shape with finger pressure, and once the curvature had been achieved, it was tacked in place using dots of superglue before gluing around the edge.
6
A Shawplan NRN aerial pod was modified by cutting off the strip of rivets (to mount to the cab roof) with a sharp pair of scissors. The etch can be folded up carefully using a ‘Hold 'n' Fold’ tool, then superglued together. Taking reference from prototype photographs aids correct assembly and positioning.
7
Next, the windows were squared and enlarged with a craft knife, followed by a square needle file. The Shawplan sizing guide must fit, as the etched window frames were then superglued. One cab door was also removed with a craft knife, to represent an open door.
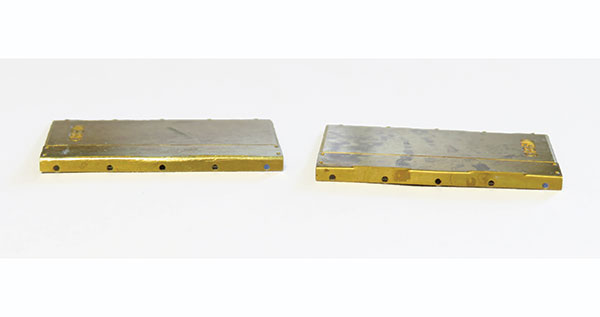
8
One main external difference on the class 20/3s is the fuel tanks. Produced by Shawplan, the base had the rivet strip folded (Hold ‘N Fold tool), revealing two slots into which the side panels mount. This leaves two raised edges, which were removed with a fine needle file.
9
A 400°C soldering iron was used to assemble the tanks. The area was cleaned before soldering using a glass fibre pen, ensuring a good joint. The amount of solder is irrelevant as it is inside the tank, but for external parts, superglue was applied with a cocktail stick.
10
To mount the tanks, the near-cab grille was removed. This was done with a chisel-bladed craft knife, working cautiously to skim minimal material off with each pass, before sanding with abrasive paper.
11
All contact surfaces must be cleaned using 1200 grit abrasive and a fibre glass pen. A generous amount of superglue was used to bond the tanks, with less glue used to bond the Shawplan smaller height grille to the body. Refer to prototype photographs to ensure correct orientation.
12
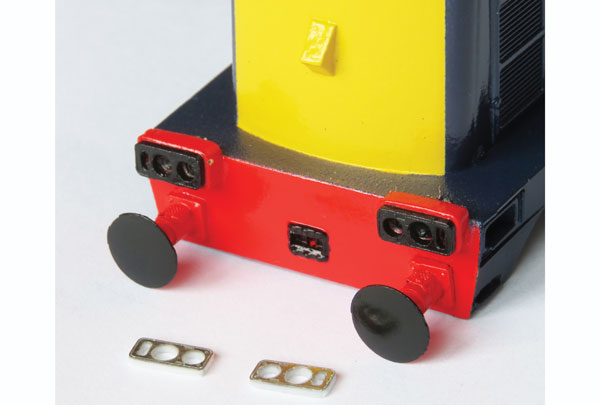
The working light clusters were created using 1mm copperclad sheet, the same shape as Shawplan’s light clusters. A knife was used to cut tracks and a pin vice/drill used to create holes (right), then red and warm white 0603/0402 size surface-mount diodes (SMDs) were soldered into the holes (left). The SMDs must share a positive common for DCC.
13
Enamelled copper wire (0.3mm) was soldered to each ‘pad’ on each board. Before soldering, enamel was stripped off the ends of each wire using a knife. A small amount of solder was applied to the end of the wire, which was then fused to the board. Test each SMD with a small 3V cell battery before continuing.
14
After the wires have been soldered and the units tested, they can be mounted. This requires a hole to be drilled in the location of the cluster to allow the wires to be passed through. The clusters can then be superglued.
15
A strip of 0.5mm thick, 1mm wide styrene was glued to the cab, along with 3mm styrene multiple working sockets as per the prototype. A Shawplan cab aerial was assembled and added, then the light clusters received a coat of Humbrol matt black paint, applied with a brush, to prevent light bleed.
16
Light clusters were added to the nose end, using identical 0.5mm styrene pieces for support. Any gaps can be filled and sanded, and the clusters were painted black like the cab end. Buffers from Markits were added, using a 0.3mm styrene square to build up the Shawplan etched buffer back plates.
17
The cab end was primed separately to the body using a light coat of Halfords grey primer, revealing areas needing attention. Fine (1200 grit) abrasive was used, with the primer acting as filler for small scratches. More black paint was used, as light bleed from the SMDs persisted.
18
Light and even coats of primer can still show up minor flaws requiring a re-work and re-spray. Getting a perfect surface finish at this stage will avoid having to paint final colours more than once.
19
The areas to be painted yellow or red - warning panels (including tank ends) and bufferbeams - received a light mist of Halford's White Primer, giving a better base for the colour. Yellow panels were sprayed using Fiat Golden Yellow. Halford's rattle cans give a superior (automotive grade) high-gloss finish, ideal for transfers.
20
Working from lighter colours to darker, VW Mars Red was sprayed next. Only the area to be sprayed was exposed using Tamiya masking tape and paper to mask the rest. Final coats must be properly applied with full coverage to all areas, including behind the light clusters, which are red too.
21
Using the same procedure, all major body colours were sprayed using Renault Royal Blue and Black. To mask the curves, the tape was stuck to the locomotive first then the profile marked out with pencil, before the tape was removed and the profile cut out using a craft knife.
22
Two pairs of Shawplan’s etched WIPAC ‘IOo’ style light clusters were superglued to 0.3mm styrene to build them up, then sanded and drilled to match the etched profile. These were superglued to each end, then black details were hand-painted using Humbrol 33 enamel matt black.
23
Transfers were from Railtec. Individual elements were cut using a craft knife then soaked in water until they floated free. They were placed with cocktail sticks and dried fully using cotton buds. A light coat of Humbrol gloss acrylic varnish was applied to the entire body after each application had fully dried.
24
Humbrol enamel and masking tape was used for the cab cant rail lining. Shawplan windscreen frames and ‘Laserglaze’ windows were attached with Deluxe Materials ‘Glue 'N' Glaze’ adhesive, while the nameplate was attached with 3mm double-sided tape and the original handrails were re-affixed with superglue. 1.5mm and 2mm fibre-optic cable was used for light lenses.
25
For LEDs to operate safely, they each must pass through a 10KΩ resistor as they operate at a small voltage. This was achieved by soldering an 0603 size surface-mount resistor to Veroboard, with the input from the decoder on the right and output to the LEDs on the left.
26
The wires from the resistor boards at each end were soldered to a DCC 21-pin breakout board. For now, directional day headlight operation has been modelled. The wiring diagram for the LokSound V5 decoder (or any other decoder) used can be found on the manufacturer’s website.
27
Reassembly came next. New Hornby and Bachmann air pipes and screw couplings were superglued to the cab-end bufferbeam whilst Shawplan twin arm windscreen wipers were glued with ‘Glue N Glaze’. Drivers from Modelu were glued into the cab, and all details (including bogies and wheels) were brush-painted with Humbrol enamels where appropriate.
28
Superglue was used to re-mount the original handrails, using a 0.7mm drill in a pin vice to open out the holes. Smaller Heljan air pipes and the original coupling hook were added in the same manner, which allows a tension lock coupling to rotate freely.
29
Directional day lighting was tested at both ends. Because each LED was wired separately to the resistor boards, fully independent lighting control will later be programmed - using the 10 powered function outputs (FOs) - into the Loksound V5.