08 November 2019
|

We guide you through some of the detailing steps only using the supplied extras.
Dapol’s OO gauge model of the Class 52 Western is excellent in terms of its accuracy and performance and includes a comprehensive detailing pack to allow modellers to get the best from it if their layout permits. We guide you through some of the detailing steps only using the supplied extras.
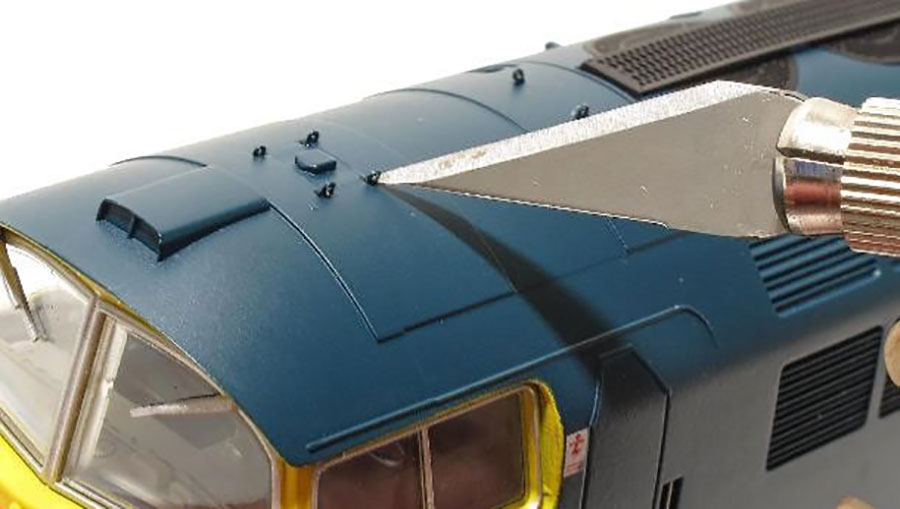
Roof-panel lifting eyes
This task is quite challenging, I certainly need to don some close-vision assistance to see what I’m doing as each etched part is only 1mm in length once cut away from the etch! And there are 32 of them to fit. Without them you will just see small slots in the roof surface and fitting them makes a surprising difference.
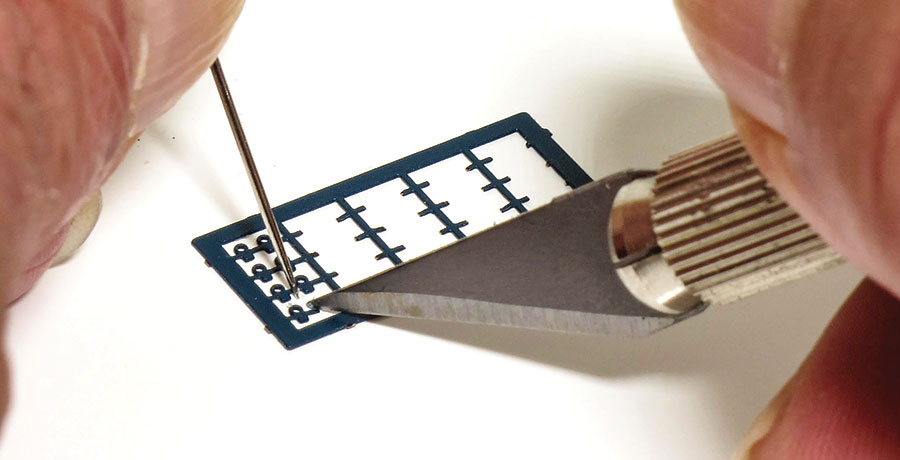
Place a needle point through the eye of the part before cutting away from the fret. 40 rings are supplied and 32 are needed so you can’t afford to lose too many.
I find that picking the ring up on the tip of a fine scalpel works well. I trace the end of the part through a small spot of superglue to pick up a tiny amount of glue on the end and then place into the slot. Hold the ring in place for about ten seconds until the glue sets.
Headcode characters
Although slightly underscale the supplied characters provide enough for a useful range of workings including the later ‘domino’ spots and, thankfully in this case, the right characters to replicate the codes appropriated to mimic the locomotives number, in this case 1O23.
Cut through about 1mm inside the outer edge of each character block.
Peel back the black foam which is to minimise light bleed from the LEDs and place the character set inside the headcode box glazing. Remember that you are working back-to-front and upside-down when orientating the characters.
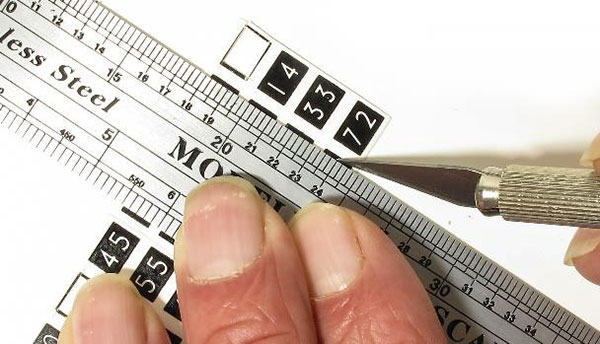
Etched plates
This model includes plates made by Shawplan from their Extreme Etchings range, the definition and accuracy are superb. The model includes correctly sized name and numberplates and a separate small etch for the builder’s plate, in this case denoting that it was a Swindon built locomotive.
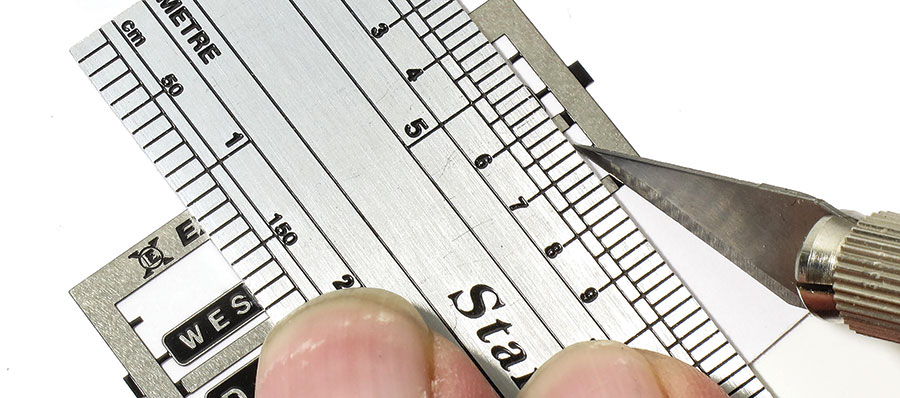
Place a steel rule over the plate to avoid bending and cut away from the fret with a scalpel blade, that’s enough to easily cut these but when the model is finished you may find the blade needs replacing.
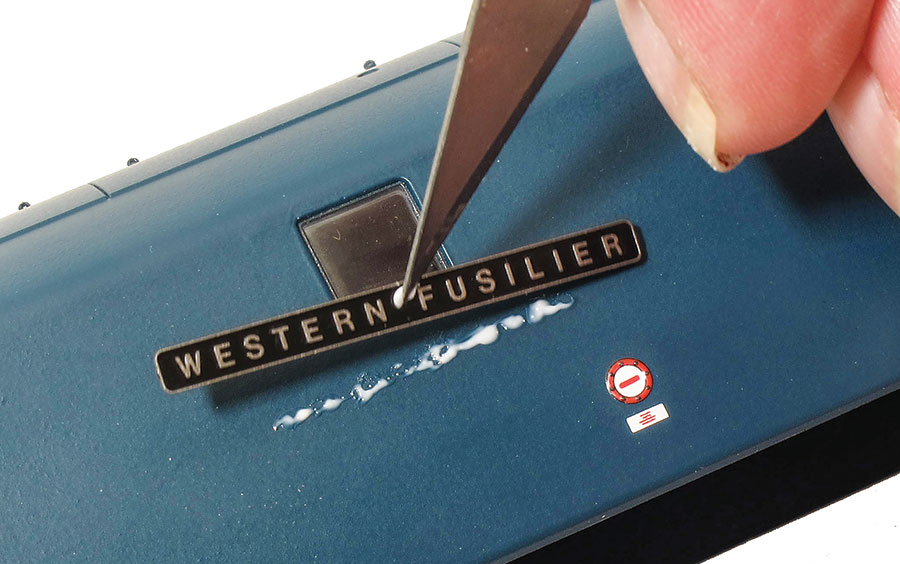
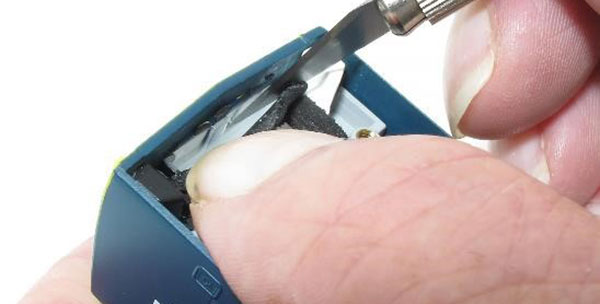
Dapol have printed a series of dots onto the bodyside for the correct positions for the nameplates and cabside numberplates. I run a trace of PVA glue along the line rather than gluing the back of the etched plates and then pick up the plates with a blob of tacky wax on the point and move into position. Using PVA allows you a period of time to adjust the plate’s position, I use a small painting bud for this.
Additional fittings
There are additional parts to fit for the brake rigging, steps, speedometer cables etc., I find it easier to add these to the chassis whilst the body is off. You won’t be able to fit all of these if you want the model to negotiate Radius 2 curves so it’s worth testing the limits.
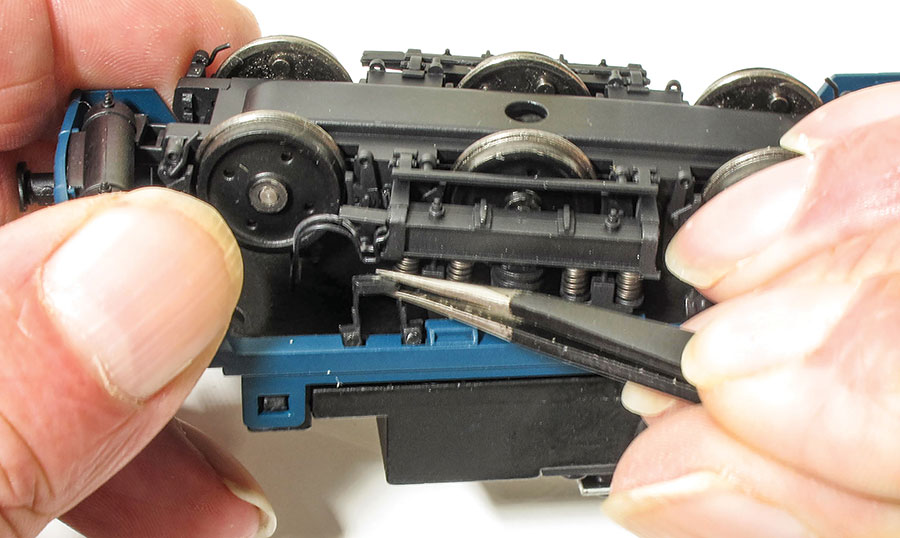
The parts are a good interference fit into their locations which are clearly shown on the detailed instructions included. I do wipe the tabs of the fittings into that small spot of superglue though before placement just so they stay where they should be as losing any of these on a large layout will mean you would be very lucky to find them again.
Now we have a completed Western, not only is it a great model but you will have also done some modelling yourself!
