Due to scale constraints, we can’t model everything and so inevitably a compromise has to be made. Therefore, it is good to pick out a few species for special attention, especially those that define a place, era or season. For these key species, you should establish their defining features and then be sure to model them with these features and exaggerate them, even to the point of creating a caricature.
For this exercise, two foreign invaders, buddleia and ragwort, have been chosen. The former has become a blight on the modern landscape and a real nuisance to companies like Network Rail. So ubiquitous has it become, that to model the modern scene and not include this weed would be unthinkable. The latter is another common foreign invader that inhabits grassland and urban waste ground and is a danger to foraging animals. Both these plants are clearly identified by their growth habit and bright flowers.
The majority of layouts are set ‘sometime in the summer’ and are often devoid of flowers to identify exactly when that is. They probably best fit with the period known as the ‘June gap’ between the late spring and early summer flowers, hence they all look the same. Try and add a few species that flower together and thus pin the time down to a more specific period than just ‘sometime in the summer’. In this way, you can make your layout stand out from the crowd.
Shopping List
- Humbrol Enamel 84 and 187
- Gaugemaster GM103 or Busch 7042
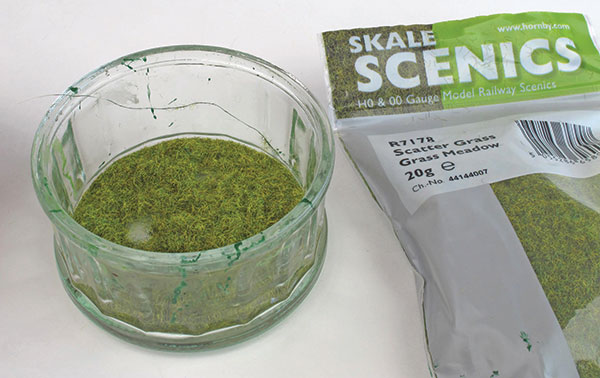
- Hornby SkaleScenics Grass Meadow (R7178)
- Busch roadway (1106)
- Hornby SkaleScenics Silver Birch (R7215),
- Hornby SkaleScenics gravel R7166 and R7164
- Hornby SkaleScenics Puffer Bottle (R7182)
Content continues after advertisements
Constructing the buddleia
1
Cut out some strips of cardboard to act as holders. Cereal packets are a good donor for this.
2
Take some sisal string and unwind the main strands ready for use.
3
Add a blob of glue from a hot glue gun onto cereal packet cardboard and immediately insert the end of one the sisal strings strands. The glue will quickly dry and you can then snip off the string to your desired bush height. Repeat this for the number of bushes that you require with a few extra for spares.
4
For each bush, unwind the string and separate the individual fibres. You can bend them to the characteristic arc of the stems of this plant by drawing the fibres between your fingers.
5
Spray the plants with enamel paint – we used Humbrol Enamel 84. When dry, you can dry-brush using a close shade, such as Humbrol 187 and add light washes of a darker shade to add depth.
6
Apply PVA glue to each branch using a brush, or, if you find this difficult, use an aerosol glue such as spray mount. Now sprinkle with a suitable green scatter. A sawdust based scatter will suffice, such as Gaugemaster GM103 or Busch 7042.
7
When the bush is dry, apply PVA glue to the end of each branch, then dip it into purple scatter material. You could also use white as this colour of flower is also found in Britain, although it isn’t as common.
8
Ensure that the ends of the branches droop in a way that distinguishes these plants. If needed, use a pair of tweezers to grab the branch near the end and then bend it down without breaking it.
Making Ragwort
1
Cut a 4in piece of sisal string and unravel it so you have individual fibres.
2
Make up a mix of PVA glue, green acrylic paint and a little water.
3
Take one strand of fibre at a time and coat it in the mixture.
4
Now transfer the strand to a container of static grass and get an even covering. Place the strand to dry. We used Hornby SkaleScenics Grass Meadow (R7178).
5
When dry, form the strands into a bundle and use masking tape to secure the top and bottom so that it can be handled. Spray with dilute PVA glue and sprinkle on a few leaves (Gaugemaster GM103). Now hang it up to dry.
6
To make the flower heads you can buy scatter or make your own. Make as many flower heads as you need. You will need some sawdust and yellow acrylic paint.
7
Mix a little yellow acrylic paint with an equal amount of water and add it to the sawdust. Keep mixing until the colour has been absorbed by all the particles. Mix more paint if you need it, but you won’t need much as you want a dry mix that will dry quickly.
8
Cut the stems from the masking tape and add PVA glue along the top edge. Dip into the flower mix and allow to dry. The plants can be torn or cut away when you are ready to ‘plant’ them.
Building the baseboard
1
To keep weight down we will use some formers for the limestone piles. Take some washed cake foils and mould them to a pyramid shape between your fingers. To add interest to the scene, use a variety of sizes.
2
For variety, you may want to collapse the side of some of the formers to represent piles that have had quadrants removed.
3
Spray the formers with an undercoat of primer. Since they are only light in weight, you will need to stick them down beforehand using double-sided tape or spray mount adhesive. Don’t forget to wear a facemask.
4
Stick the formers in situ on your layout or diorama using a contact adhesive. Since this project was a proof-of-concept exercise, the base was a shelf from an old wardrobe.
5
Paint the baseboard a ground colour to tie it all in. We used a grey emulsion made by adding black paint to a tin of white emulsion.
6
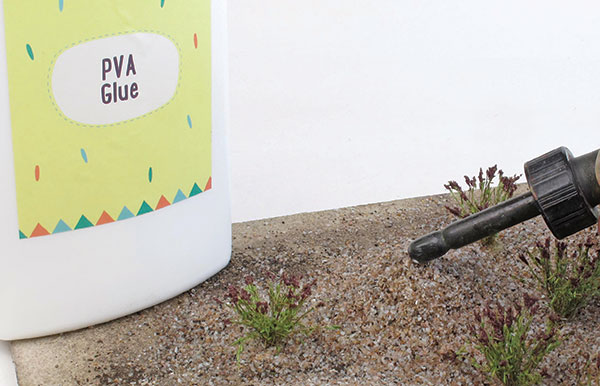
Add a ground cover to the entire baseboard using PVA glue. You can use any earthy coloured scatter for this.
7
Use a range of colours for variety on the ground cover. This will look far more realistic than using one colour.
8
At this point we added a concrete roadway to the baseboard. This is a Busch kit (1106), stuck in place using PVA glue that will dry quickly as the pieces are made out of cardboard.
9
The Busch kit is very easy to use. Release the concrete sections by cutting through the retaining tabs with a sharp knife. Note that the pieces are treated on one side only – be careful you don’t stick any upside down as they are difficult to remove without causing damage.
10
Remove the buddleia from their mounts with a sharp knife and cut facing away from you. Trim the base to shape afterwards.
11
Since the buddleia bushes have a large base, glue them in place before adding more ground cover as the latter could be used to disguise them. For speed use a contact adhesive, but PVA will work, too.
12
We added a ready-made tree to provide some height. This one is a silver birch from the Hornby SkaleScenics range (R7215). It is worth buying a few centre piece items like this, especially for foreground areas.
13
Paint the mound formers and the base with thick PVA glue, then sprinkle the limestone ballast into place. We used a mix of Hornby SkaleScenics (R7166 and R7164), which are supplied in handy resealable bags.
14
Add more gravel and allow it to find its own angle of repose so that the mounds look realistic. Add PVA diluted with some water and a little washing up liquid to glue this additional layer in place.
Finishing touches
1
Add static grass to tie in the ground cover. For small areas like this, the Hornby SkaleScenics Puffer Bottle (R7182) is ideal. Don’t make the grass too green and luxuriant in an area of poor soil such as this. We used Hornby SkaleScenics Grass Meadow (R7178).
2
Represent traffic usage on the concrete path by applying a dark grey weathering powder where tyre tracks would go. Use a model from your vehicle fleet to get this distance correct.
3
We made some additional buddleia to represent dried branches that have been cut down or dislodged by passing vehicles. Make these as the others, but spray with light and dark grey to represent the dead leaves and dried flower heads. Then cut the branches off the base and glue into place. ‘Plant’ the ragwort at the same time. Diorama complete!
![How to model summer on your model railway]()
Looking to model other seasons? See below guides to help you capture the look.
How to create a spring scene
How to model winter
How to model an autumn scene
Looking for more advice on adding static grass to your model railway - our video explains all.
If you're thinking of tackling water on your layout? Our guide on how to model water here should be your first port of call.
Need more advice? Take a look at the BRM Techniques page for all our latest guides and advice articles.