Some modelling projects demand hours of work and the results aren't that impressive or exciting. Others will amaze your friends and family, but not actually require that much skill or effort. This is one of those.
At first sight, this Pit Head looks fearsome. Made of delicate metal latticework, it's a mass of detail. Even more impressive, this model is in N gauge, so surely you need to possess the skills of a watchmaker to assemble it?
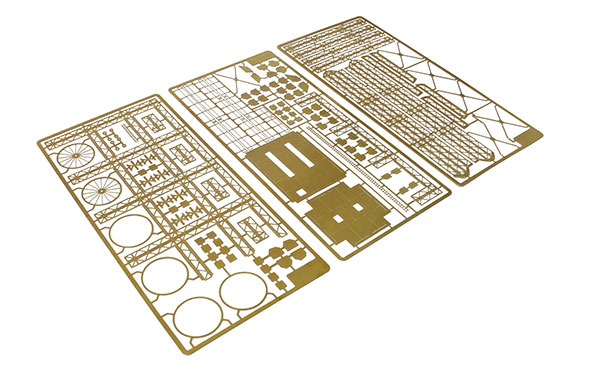
Don't tell anyone, but the answer is no. The model is built from a kit designed and manufactured by Severn Models. Supplied as a set of brass etches, the modeller just has to follow the instructions, carefully removing and forming each part before fixing it in place.
You might assume that, at the very least, the parts will need soldering together, after all this is the usual advice for assembling etched brass kits. The good news, for those who see the technique as a black art, is that superglue will do the job. Andy Vaughan, the designer, is happy to show how all his models can be assembled with the stuff when he builds them at exhibitions.
Even a confident solderer like myself would be wary of trying it on this model. Any excess solder inside the lattice legs would be pretty much impossible to clean away for a start.
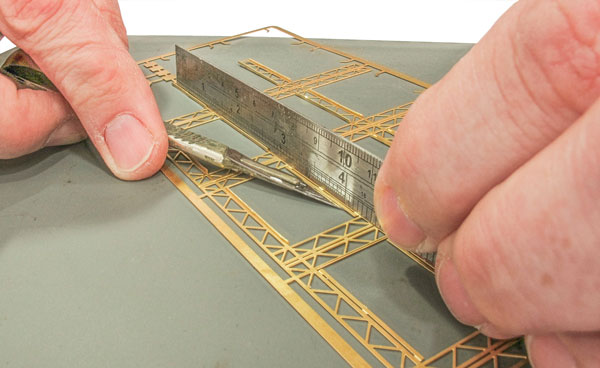
As it is, the most challenging aspect is forming all the bends, but with the aid of nothing more sophisticated than a steel rule, it's not a hard job. A line along where the metal will be bent is half-etched and if this is kept on the inside of the bend, the metal will naturally form where it's supposed to.
You don't even need many tools – a craft knife, steel rule, scissors, flat file and a small pair of pliers will be sufficient. It's a pleasure to build a well-designed kit.
Content continues after advertisements
1
The etched parts for the model are supplied in an envelope attached to some plywood with elastic bands to keep them flat. Care is certainly needed to look after them as the metal is very thin and you really don't want to bend it.
2
Remove parts as required by cutting through the tabs holding them in the fret with a hefty craft knife. The remnants of the tab can sometimes be filed away, but I prefer to use scissors. You don't need anything special for this - these cheap scissors have been on my bench for a decade and they are still sharp enough.
3
The sheave wheels are made up of three layers that can be arranged so there is a groove around the edge for the ropes. Bearings and supports are included and slide through the centre, allowing the wheels to rotate.
4
Bending the short and very thin tabs on the main supports is easy if you hold the part on a mat and lift the tab with a blade. Remember that the half-etch lines are on the inside of the fold. Once the metal is partly bent, a flat screwdriver blade or steel rule can be used to complete the job.
5
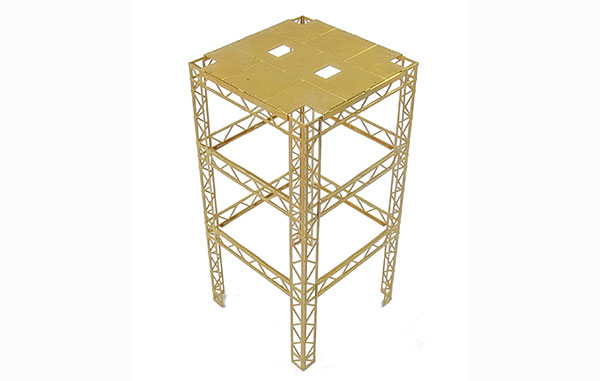
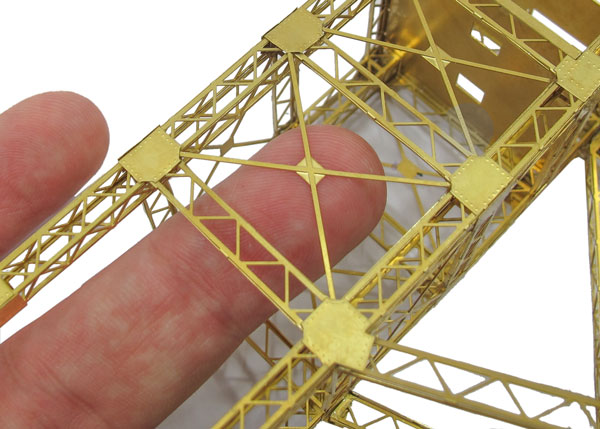
The main leg etch folds up with the joints being half-etched overlaps. The lower of the two platforms then sits on top with the edges overlapping the top latticework. Once the glue is dry, the structure is far stronger than it looks.
6
Folding the upper level is the same as the main leg and they are stuck to the top. The glue joint is weak but fixing the gusset plates makes things strong. Finally, the inner 'L'-shaped sections of latticework are folded and glued to make all the legs a square section. The tabs folded over at the start of the process help hold these in place, but a dry-run with each piece is important to ensure they go in the right way up.
7
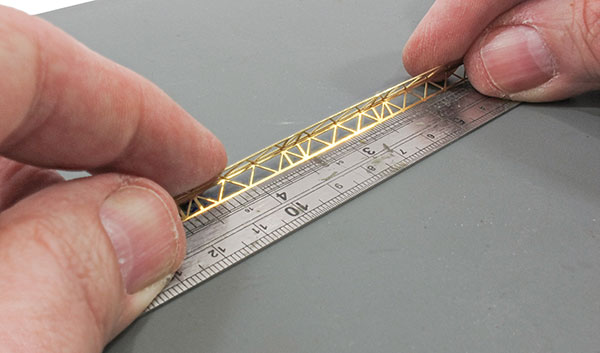
Moving to the long, angled legs, these are folded from flat to a square section and it's best to use a steel rule to hold the piece down when each bend is started. The metal folds easily enough, but try not to bend it back and forth too much or it can harden and snap.
8
The long legs are joined by more rails, and a cutting board marked out with squares helps to ensure they are both leaning in at the same angle.
9
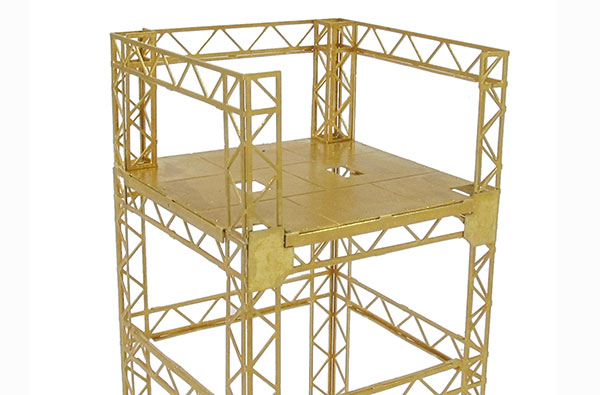
Sticking the legs to the main body is where epoxy resin beats superglue. The bulky glue ensures that you don't need a perfect joint at the top. Adding the gusset plates helps beef the joint up. Using weights to hold everything in position while the model is sitting on a mirror or other flat surface helps keep all the legs on the ground.
10
The fiddliest job is attaching the cross bracing. This is fitted from inside the tower using a drop of superglue on the end of each arm. The piece has to be accurately placed in the hole so each arm touches a corner. Job complete!
Want some warehouses to complete your scene? Our guide on how to build and detail a card kit is worth a read. Or if you’re interested in creating some roads and pavements, our handy guide is filled with tips and advice.
Every site needs a portakabin, see how to create one in our latest practical kit build here.
For more help and tips for adding grass to your model railway - watch our video on how to create realistic scenery using static grass here.
And what about trees? Our online guide will help you get to grips with ‘planting’ trees on your model railway.
Need more advice? Take a look at the BRM Techniques page for all our latest guides and advice articles.