


15 December 2022
|

Want to learn more about Magnorail and how to animate your model railway? Phil Parker tests this clever working accessory from the Netherlands.
Animated scenes are incredibly popular and add interest to a layout. A working cyclist on a model will fascinate everyone who sees it, even those with only a passing interest in model railways. It appears magical...
What is Magnorail?
As well as moving bicycles, the Magnorail system can haul road vehicles, even boats if fitted under a model river. Unlike the Faller road system, there’s no need for onboard power in the vehicles, so the size of the model isn't an issue. And, you can control the drive motor directly, so vehicles can be made to speed up, slow down or stop.
The cyclist sits on an etched steel mount – the little feet stick out from the wheels to keep him upright. The basic set has a male cyclist, but a female version is available, too.
The legs are driven by a clear plastic wheel that sits where the cranks on a real bicycle would be. This wheel runs along the road surface and as it spins, it moves the legs attached to the pins.
Under the road, a plastic chain runs in guides, fitted with a pair of high-strength magnets. These grip the feet on the bike wheels, pulling them along and downwards, so the clear wheel has enough friction on the road surface to rotate. The chain is driven by a pair of rubber wheels that grip either side in a simple mechanism, powered from a 12V DC geared motor. The rider’s speed is normal too – not Bradley Wiggins on the Tour de France time trial!
How to install it
Magnorail's starter set provides enough for a small scene. With 150cm of track, extra lengths are available, and if you want a really long run, the website advises the use of extra drive mechanisms. Turning loops are also sold, so that vehicles can run along both sides of a road, changing direction in a hidden fiddle yard.
Obviously, the system has its limitations, the main one being that you can't cross baseboard joins. You’d need access to split the chain when the boards are apart. This isn't impossible though, as a bit of ingenuity would allow an access point where the chain could be pushed down the guides.
My main worry is that everything has to be buried in the road surface. You can't even change a motor without digging it up as the fixing screws are on its face. The surface also performs a vital job in keeping the chain in the guides, especially through the drive mechanism.
According to the instructions, the road should be 0.5mm thick and Magnorail recommends a card surface. This would provide some grip for the leg powering wheel and if you can find something pre-printed it will look better than a plain colour. The bicycle needs a smooth run though as it slides along, so joins need to be perfect.
Having said this, with care, assembly isn't difficult. I made things harder for myself by using a clear plastic road so we can show you the mechanical side. I know people will be curious!
STEP 1

Inside the neatly laid-out box, the contents are simple. Red chain, white guides, a motor and casing, plus two pots – one with a cyclist kit, the other with all the fittings you need. A clear set of instructions is provided.
STEP 2

The chain and guides simply clip together. Two options are available for the guides, either build up the road surface around them or let it sit on top of the wings moulded into the sides. All screws are supplied.
STEP 3

Powerful neodymium magnets are fitted in the chain. The north poles should point upwards. Placed together, the north and south poles will grab each other so you can identify them. I coloured the sides with permanent marker so I could work out which way round each one goes when fitting.
STEP 4

Inserting the magnets is a challenge as they’re a tight fit in the chain. After many frustrating attempts, I found the easiest way was to attach one to a jaw of some pliers and then squash it into the hole.
STEP 5

A hole in the baseboard 10cm x 6cm is required for the drive mechanism. The geared motor runs from a 9V battery, although it's designed for 12V DC. The chain is a slippery plastic that runs smoothly in the guides – oil or grease might stop the rubber wheels gripping, so don’t lubricate it.
STEP 6

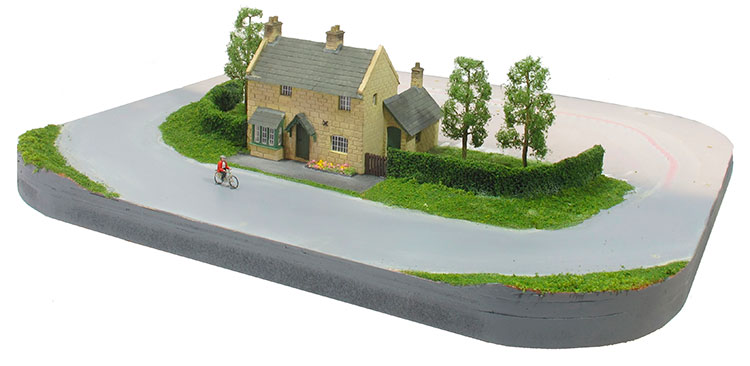
My basic diorama on a 40cm x 50cm board. Nearly all the components in the box are used. Without a road surface, the chain tends to climb out of the rubber drive wheels at this stage.
STEP 7

8mm plywood is an excellent match for the height of the guides. Using a jigsaw, I cut a sheet to accommodate the track.
STEP 8

The road surface should be 0.5mm thick, but for demonstration purposes, I want it to be clear over the drive mechanism. A local DIY store supplied 1mm thick plastic sheet. When screwed down, it holds the chain in place quite well.
STEP 9

The cyclist is supplied as a kit. His bike is etched steel that just requires its feet folding out. A clear plastic disc slots into this and drives his legs. Be careful what you paint as the mechanism needs to be free running. The fret includes bend guides to help assembly.
STEP 10

The road surface should be 0.5mm thick, but for demonstration purposes, I want it to be clear over the drive mechanism. A local DIY store supplied some 1mm thick plastic sheet. When screwed down, it holds the chain in place quite well.
STEP 11

Old images of cottages in a nearby village showed them at road level with inlaid brickwork around the front. I replicated this with Slater’s Plastikard. Strips were built up in layers to form a flowerbed, also seen in the photographs.
STEP 12

Hedges are cut to shape from foam rubber, coated in PVA, then rolled in flock powder. More flock is applied to the verges, which are normally kept pretty well trimmed. I thought that electrostatic grass would have been too long here.
FIND OUT MORE
More information
If you enjoyed this, why not try:
Locomotive lamps: a beginners guide
Model railway baseboards: all you need to know
UK model railway eras explained
Your weekly World of Railways newsletter
Are you subscribed to our weekly email newsletter? Don't miss the latest news, reviews, modelling advice and competitions.
