An ideal way of honing your modelling skills is to test new techniques on something small before you apply yourself to that grand layout design of your dreams.
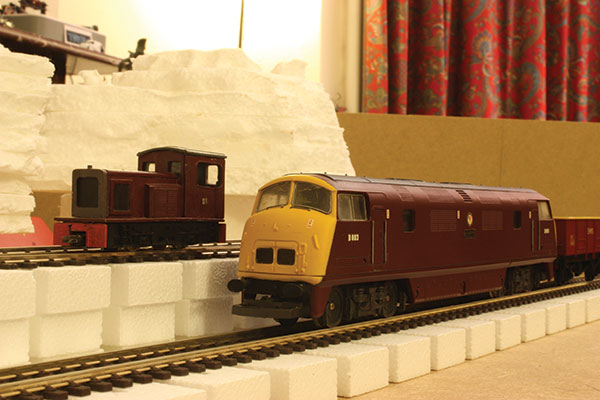
We decided to build a diorama based around an industrial narrow-gauge line and thought that a transfer siding between standard and narrow-gauge sidings would provide many interesting opportunities to take photographs.
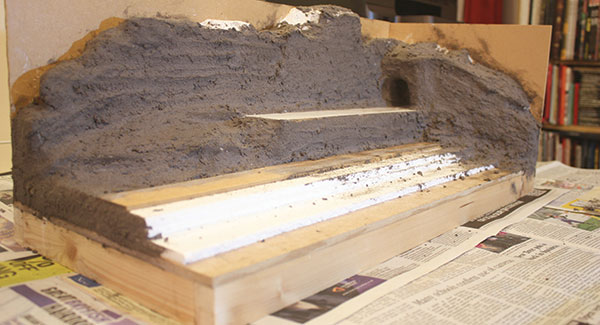
'Quarry Transfer' was built on offcuts of MDF, mounted on a baton timber base. We wanted the landscape of the quarry to make sense and tried to imagine how the landscape would have looked before the quarry was constructed. We imagined a slightly graded limestone grassland, surrounded by rock outcrops, which were blasted and cut to create the quarry system.
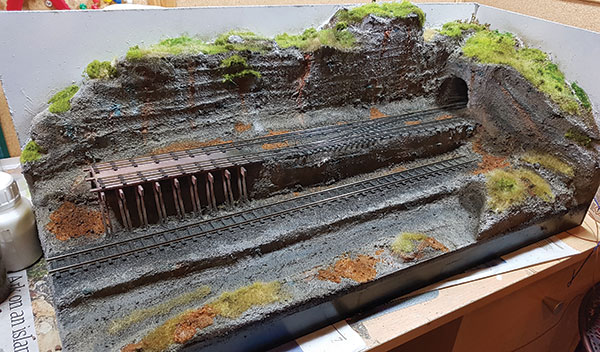
The diorama took five days in total to complete and gave plenty of opportunities to develop skills. It has now given me inspiration and ideas to start work on a larger quarry layout.
Shopping list
Content continues after advertisements
- 3mm MDF
- Polystyrene
- Plaster Bandage
- Tile Grout
- Car Spray Primer (white and black)
- Artists Acrylic Paints
- Coffee stirrers
- Matchsticks
- Copper-clad PCB strips
- Static grass and modelling foliage
- Static-grass applicator
1
The cliff faces were made from thick bits of polystyrene. Glue smaller pieces, in stacks, onto the top of the cliffs to resemble a peak, then glue them onto the backscene in an arrangement that looks like cliff strata.
2
We started the project by messing around with bits of polystyrene and wood to see how best to frame the two different gauges in photographs. Heights were calculated to make sure that narrow gauge loads could be tipped into standard gauge wagons on the lower level.
3
We made the tunnel from a curved bit of flexible plastic sheet and hid it behind a polystyrene tunnel mouth, which was carved to resemble a narrow-gauge railway tunnel. We also conducted plenty of tests with narrow-gauge locomotives to make sure they could fit through the tunnel.
4
Plaster bandage is great for fixing areas together and providing softer edges, so we used it to create the tops of the cliffs, which follow natural contours and feature soil and vegetation.
5
To create the rough texture of the rock faces we used tile grout – a mixture of adhesive and coarse sand. It’s relatively cheap and comes in different dark colours. Use rubber gloves and brush it onto the polystyrene by hand while trying to retain interesting fissures in the rock.
6
Further photography helped to develop the camera-facing part of the diorama. It seemed logical to follow the established contour of the cliff and keep these areas low so they didn't block the view. We glued together polystyrene rocks and cut into them with a soldering iron with a hot knife tip.
7
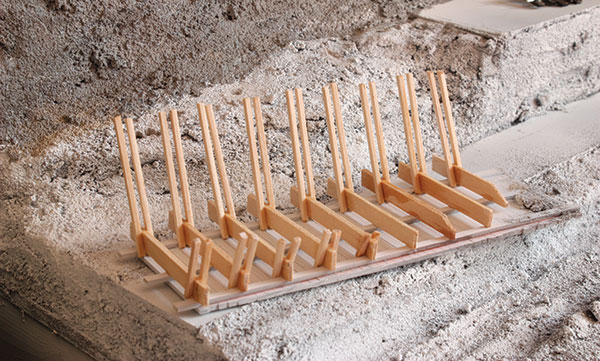
We made the quarry pier from copper-clad strips, which are normally used to make track. We soldered them together, with two long beams underneath. This is an easy way to test your soldering skills and means that the pier structure is solid.
8
The pier legs were made from matchsticks and coffee stirrers. The legs were pre-cut to the right length to fit the cliff areas beneath, then filled with grout.
9
We then primed the pier with white primer and painted it with brown acrylics, finishing it with dry-brushing to give it a worn appearance.
10
We sprayed the diorama white and began using acrylic paints to paint the cliffs. It’s better to use artists’ acrylics because quite a lot is required. There are a variety of colours in natural rock faces, so brown and blue paint was added to the cliffs. We painted along the strata to give the effect of different ages of rock and also painted up and down to give the appearance of weathering. Brown paint was washed over the rocks to make it look like it’s leached through the strata.
11
Set track from the shop has a habit of looking out-of-place on temporary sidings, so we removed a few of the sleepers using wire cutters to give them a more realistic look, leaving much larger spaces between the sleepers on the narrow-gauge lines.
12
Fix the track onto the wooden panel base using superglue and the odd track pin here and there. We have used a few miniature anvils to keep things in place as the glue dried.
13
The finest ballast we could find is used to sprinkle between the tracks. To fix it, drip a pipette of watered-down PVA glue between the sleepers. add washing-up liquid to the mix to ensure the water droplets would penetrate the ballast, removing the surface tension.
14
Ballast never looks right without weathering, so the track and point blades are covered and then we spray-painted a dark grey across the track. This gave a nice convincing effect of the dirt build-up caused by diesels or steam engines standing on the track.
15
Dark brown acrylic paint was painted onto the top of the cliffs in areas where soil would collect. We also added a few patches on the lower levels, where we imagined the quarry works hadn't disturbed the ground.
16
We used a variety of flocks, including scenic mats parted to make brambles and thicker sea moss stems for shrubs and we applied static grass using thick PVA and a static grass applicator.
17
To reflect some of the more ephemeral grasses growing in disturbed areas, we applied yellow static grass to the edges of the cliff and at ground level. We used sandy-coloured ballast as quarry spoil and sprinkled it in random areas on the diorama, with a bigger pile at the end of the quarry pier to resemble waste tipping.
18
Some of the colour changes between different parts of the diorama can jar, so we used a spray of 'dirt’ to fuse the areas together and dull some of the more garish colours. We also sprayed blacks and greys along the edges of the track to resemble areas where water collects.
19
The generic scenery of the diorama allows almost any era of stock to be portrayed. Use of excavators and road vehicles to the front could better define a specific date, if required.
Need some trackplan inspiration? Our article here offers a variety of trackplan ideas for different levels of difficulty.
Looking for some tips in laying track? Our useful guide provides the basics to help you get started.
Need more advice? Take a look at the BRM Techniques page for all our latest guides and advice articles.