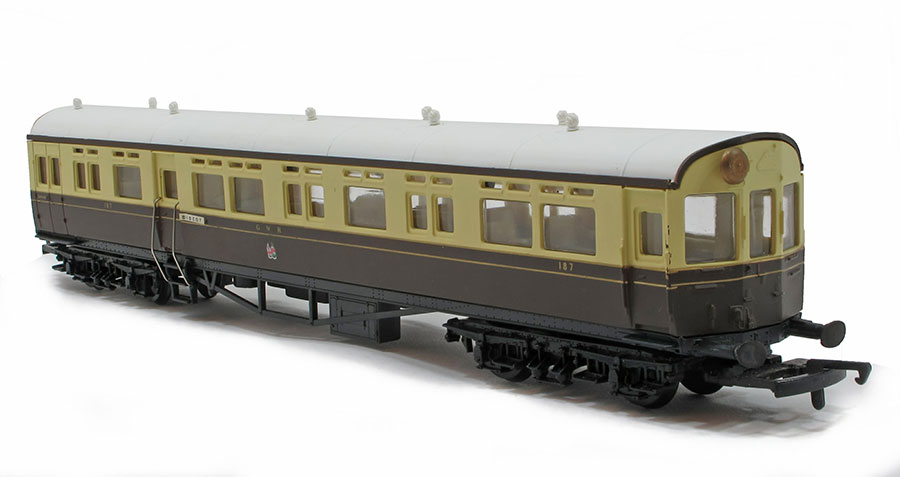
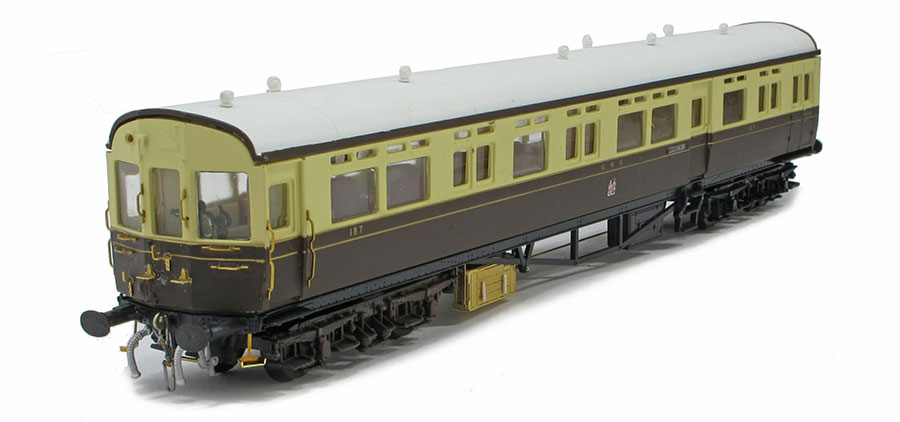
Can there be a more model railway-friendly prototype passenger train than an autocoach? A single-vehicle pulled by a short locomotive intended to potter around lightly used branch lines. Best of all, even in OO it will fit in a platform 40cm long.
Airfix GMR launched in the late 1970s and provided a real wake-up call to the industry. The levels of detail were higher than anything modellers had been used to. They also focused on the GWR – always one of the most popular railway companies. Realising that most modellers are strapped for space and so a short passenger train would be perfect, 1978 saw the arrival of their autocoach and 14xx tank, both of which can still be found in Hornby's range.
More recently, Bachmann has produced a rival in the Hawkesworth version, however sat next to each other, the older model cries out for a bit of a facelift. As luck would have it, Dart Casting produce a comprehensive kit to do the job.
1
The Airfix model looks pretty good and has always been very popular, available in at least 20 GWR and BR liveries.
2
Run a fingernail under the bottom edge of the roof to pop this off, then undo four small cross-head screws in the floor to separate body and chassis. The bogies are removed by squeezing the lugs together. Leave the glazing in place, as clear plastic can be very brittle when it’s several decades old.
3
One of the first jobs to be tacked is the removal of the moulded battery boxes. This is difficult to do, the boxes being bulky, the truss fragile and all the plastic being very old. If you must do this, remove all the trussing and replace with brass angle using the plastic originals as a guide.
4
The vacuum cylinders can come off, as they are basic lumps. Sawing from the top allows you to get some wire snips in to chop the plastic away. Finally, tidying up is carried out with a sharp knife. The leftover holes are covered with a piece of thin plastic, although you can't see when the model is on its wheels, so this isn't essential.
5
There should be three battery boxes under the coach, fold up one of the brass ones, running superglue into all of the corners and behind the legs. Proper handles are supplied, but we used plastic strip to match the pair of moulded boxes on the model already.
6
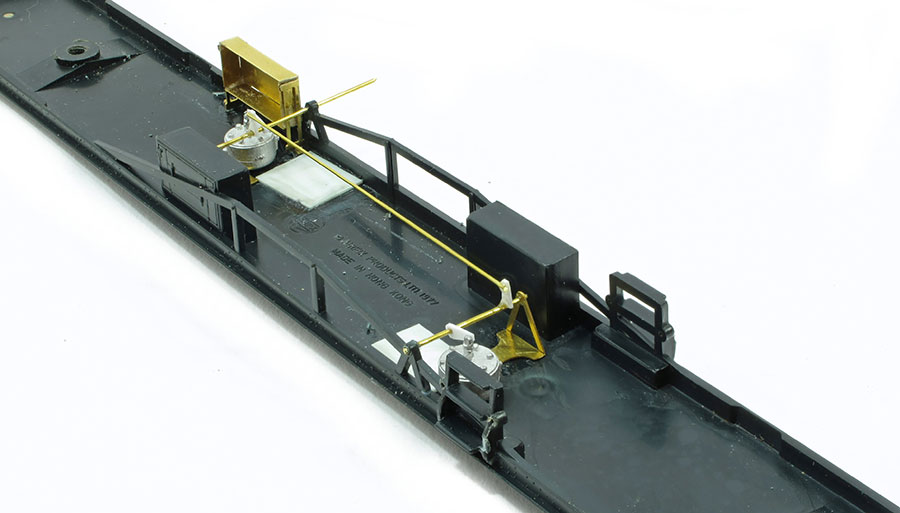
We’re using the original V-hangers for the same reason the battery boxes have been retained. Inner ones are from the etched parts in the kit and all are drilled to accept 0.5mm brass wire. Some whitemetal parts are supplied for this but wire is easier to keep straight and less fragile. We have had to make cranks from plastic strip drilled, cut to a pointed shape and fixed with superglue. The new cast vacuum tanks look a lot better than the originals even from the side.
7
Working with the bogies in place is essential if they are to be able to swing without knocking into newly fitted details. The dynamo is set up to clear the end of the bogie and its drive belt, made from a strip of metal, is cut away to keep clear of moving parts. In reality, this is a belt that runs around the axle, but again, from the side this will look OK.
8
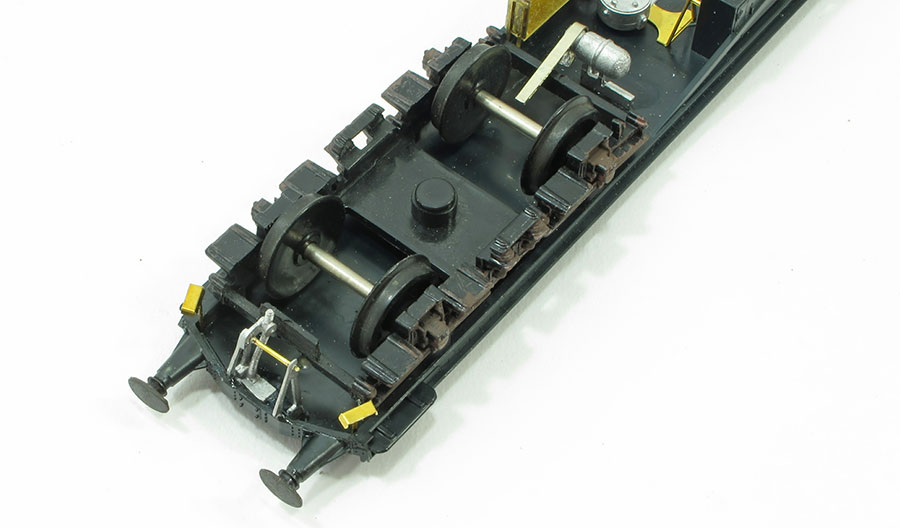
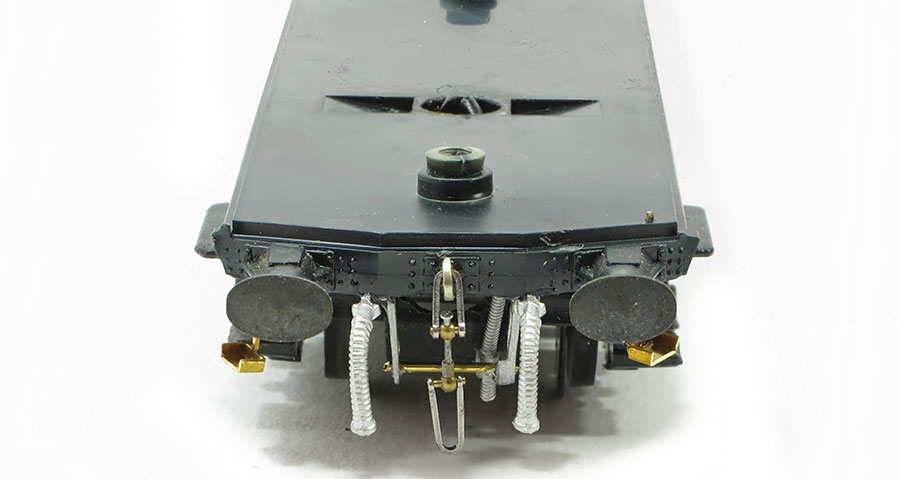
At the front (driving) end, things get really tight. The whitemetal castings are trimmed to allow them to be set forward a few millimetres and the etched plate hangers left off entirely. It's not ideal, but does add useful clutter under the driving cab. The corner steps are fitted at this end only, as they would be clobbered by the tension lock coupling fitted at the back end.
9
To make the “face” of the model look good, a Romford screw coupling is fitted into a hole drilled in the plate on the buffer beam. Pipes fit under the beam, tucking behind it for a reasonably strong joint.
10
The Airfix plastic wheels on the left were very good in their day, especially when compared to some of the steamrollers other makers fitted, but not as nice as the metal Romfords on the right. Changing over involves flexing the bogie sides to remove the old wheels and drop in the new.
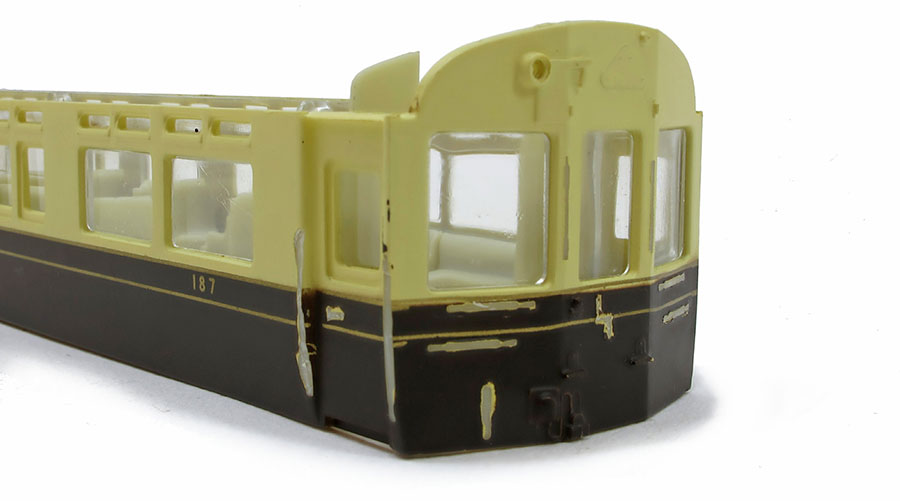
11
Time to ruin the body. The moulded-on handrails are carefully carved away using a small chisel and sharp knives. While we’re at it, the lamp irons can come off too.
12
The model will never look worse than it does now, with battered paintwork and scars all over the body. If you've not done anything like this before, it's the point at which you believe you have ruined the model. Look on the bright side, anything you do now can only make it look better.
13
Some serious touching up of the paintwork is required. Railmatch Frame Dirt is a good match, It’s not perfect, but for a working coach, it’s not far away.
14
Etched grab rails are provided, requiring a pair of holes to be drilled to accept the legs. Marking the holes is easier if you set a pair of compasses fitted with two spikes to the correct distance, then press into the plastic body to provide guides for the drill bit.
15
The lamp irons need to be folded up and added front and back. In a sure sign the kits was designed by a modeller, spares are provided on the etch, so you can afford to drop one on the floor and lose it. Superglue is ideal for fixing – use a brand with slight gap-filling properties to hide the holes.
16
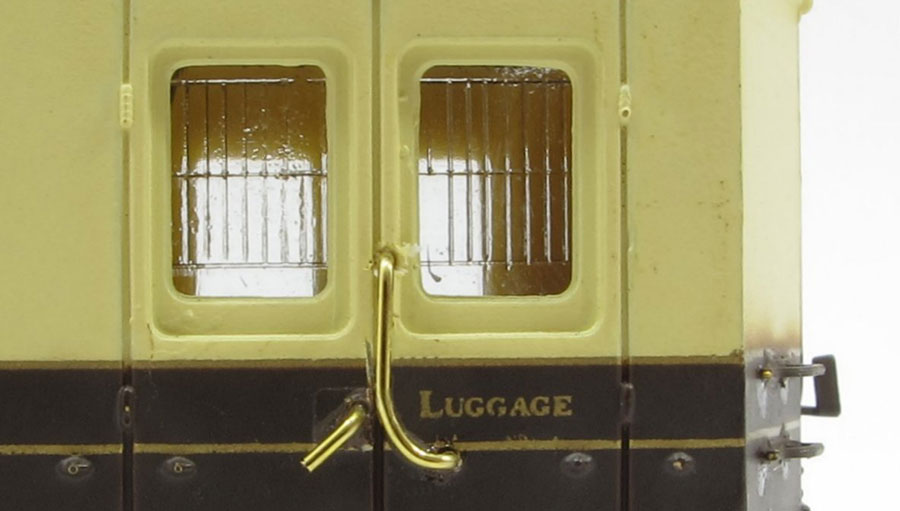
Door handles are replaced by bending bits of the 0.45mm brass wire supplied in the kit and fitting into holes drilled in the coach side. The trick is to cut them to length after fitting. Sadly, this doesn't work for the curved handrail, which is anchored at both ends and has to be bent to the right shape before gluing in.
17
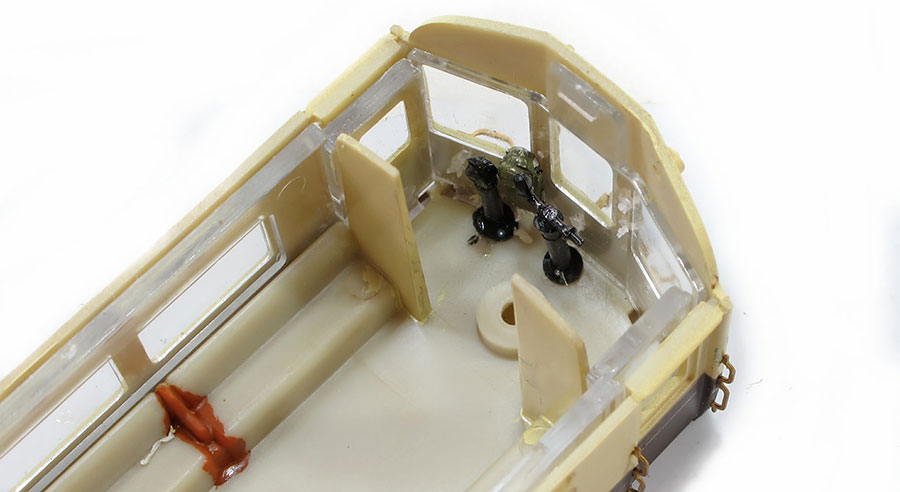
Whitemetal controls are fitted inside the driving cab. The black painted brake and regulator stands need holes drilled for spigots to go through the floor.
18
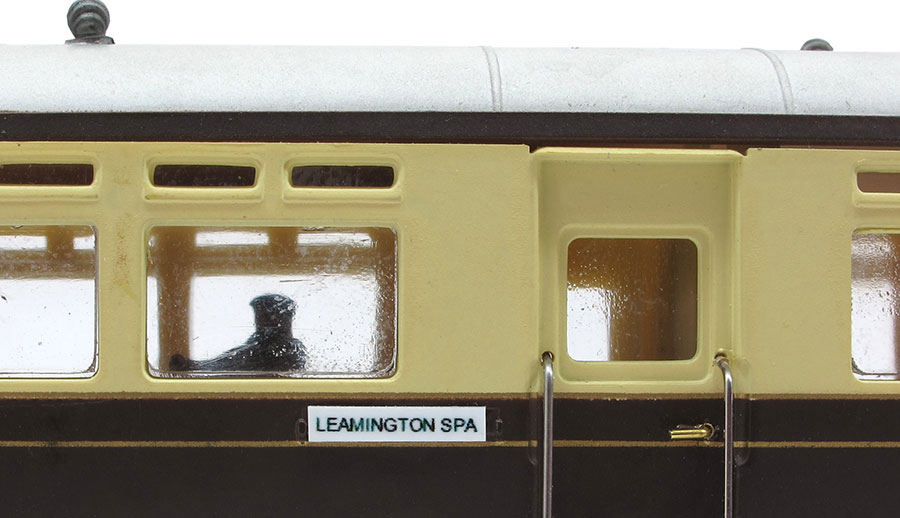
Destination boards are fitted part way along the coach side. They scale out at 11mm by 2mm and of course the originals had fallen off.
19
With everything clipped back together, the additions to the previously fairly plain end can be seen. There's much more you could do to the base model, but our aim has been to produce a piece of stock suitable for running on a layout, not a showcase queen.
20
Airfix sold the model with a self-coloured plastic chassis, but that won't do any more. We spray everything with Revell No.9, Anthracite black. This isn't a pure black, but a very dark grey that looks more convincing. Once dry, the chassis and bogies will be dry-brushed with dark grey, rust and track colour to provide the appearance of use on the railway.
21
White roofs don't stay that colour very long on a steam railway, so although the coach was to be clean, spray a much-thinned coat of Anthracite black over the top, letting it run into the ribs and vents. You can achieve the same effect with black weathering powders. In both cases, work with the roof off the model to avoid dirtying the sides.
22
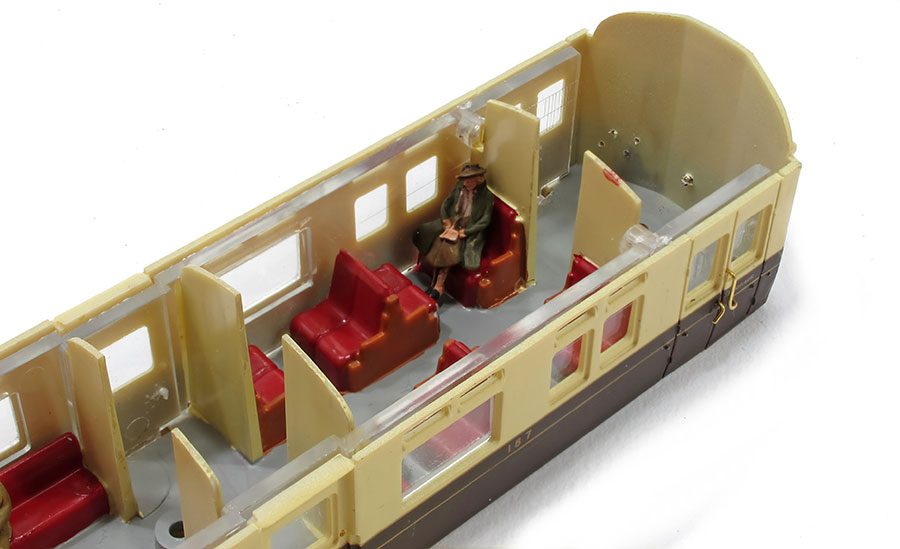
Empty coaches look wrong but Dart Castings have a special set of passengers perfect for populating this one. Cast in pewter, they are lighter than the same models in whitemetal.
23
Painting passengers is a great way to practice figure-work, as the finer details aren't so visible. we just picked out the main clothes with nicely muted colours and then gave them a wash of Games Workshop brown weathering ink to show the creases and shadows.
 enhancing autocoaches