01 September 2020
|
Phil Parker investigates a new range of laser-cut kits, ideal for modellers with ambitions of industrial grandeur.
Finding a new manufacturer in our hobby is always a joy, and when the owner of JS Models got in touch to tell me (via RMweb) about his new range of laser-cut buildings, I couldn't wait to take a look.
We are well supplied with kits made this way, the difference here being the range covers big buildings – warehouses and factories – not huts and houses. As a firm fan of the industrial scene, I love these buildings. Why bother with a backscene when you can use honking great buildings to hide the background?
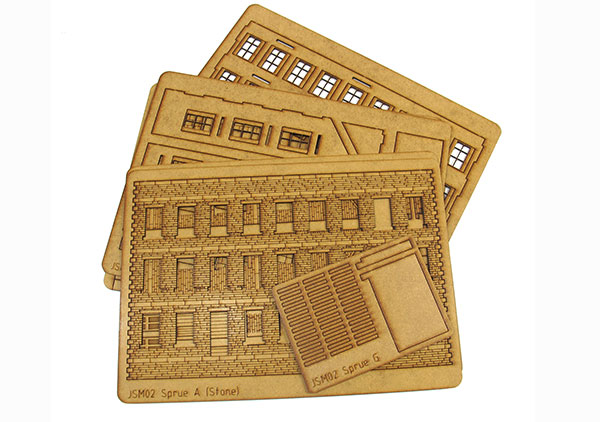
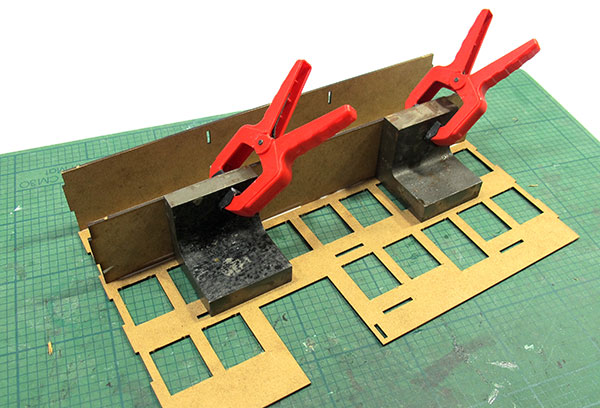
The kit arrived nicely packed in a cardboard box. All parts are cleanly-cut and there are a surprising number of laser board sheets. Examining the instructions, the reason became apparent – all the walls are two sheets of material thick. That's going to make for a strong model that will happily stand up to the rigours of the exhibition circuit, or just the handling by a clumsier modeller. At this point, I should make it clear that I haven't tested this by dropping the model off my workbench, but it's unlikely to be damaged by a fall.
One problem is that, while laser board might be ideal for laser cutting, it is very smooth and slightly shiny. Even the dressed stone the surface purports to be has a little bit of texture, so the biggest challenge I could see was adding this.
Handily, I'd been supplied with a reject wall to experiment on. I tried using a rolling pin to force coarse sandpaper into the surface, but it didn't leave a mark. A hammer was no better and even worse, left dents. I was going to have to do this with paint. After a few attempts I managed to do the job with a mix of paint and D.I.Y. store powdered wall filler. It's subtle, easy to do, very effective and could be used in many different places on a layout.
The finished model measures 280mm wide, 70mm deep and 215mm high, big enough to fill a decent section of layout providing industry to justify those goods trains. Assembly takes a couple of hours if you don't paint it, putting the strips of roof slates on being the longest job. Decoration will at least triple this, but it's time well spent and needs to be spread over several evenings to let the paint dry. It's all pleasant though, as part fit is excellent.
If you need a big building for your layout, the JS Models range is certainly well worth a look. The warehouse is available in both brick and stone finishes and appropriate for any layout from the Industrial Revolution onward. Even a modern image model could find a home for one, reborn as a set of apartments!
1

2

3

4

5

6

7

8

9

10

11

12

13

14

To find out how to transform your laser board into stone, read our quick guide here.
Want some further buildings to complete your scene? Our guide on how to build and detail a card kit is worth a read.
For more help and tips for adding grass to your model railway - watch our video on how to create realistic scenery using static grass here.
And what about trees? Our online guide will help you get to grips with ‘planting’ trees on your model railway.
Need more advice? Take a look at the BRM Techniques page for all our latest guides and advice articles.


