24 January 2020
|

Experienced modeller, Graham Nicholas, provides us with a step-by-step timeline on the construction of his iconic layout, 'Hills of the North'.
Despite taking nearly forty years to come to fruition as a layout, I was forever sketching grand model railway ‘system’ schemes at a young age, featuring railways in the hills of the North of England, usually centring on Carlisle. The concept was therefore ‘ready to go’ when I was engaged in idle conversation with fellow LMR modeller Barry Oliver. This was 2015 and thoughts were turning to Warley’s 50th anniversary celebrations in 2017, Barry being a member of the organising committee at the time. The idea of a layout depicting Britain’s railways as they were in 1967 came up and the rest, as they say …
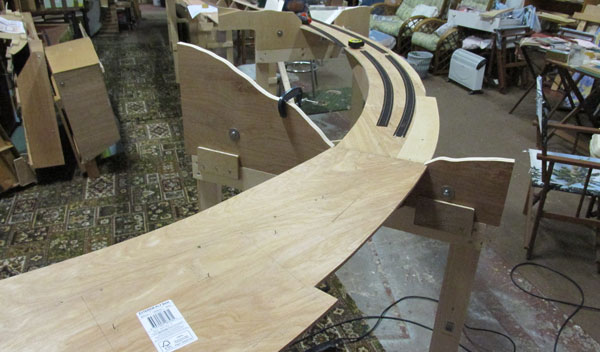
My Carlisle ‘master plan’ includes a 20ft long section of Shap Bank – basically the Shap Wells scene – and so this stretch forms the basis of the scenic section of the layout, configured as four boards, each 5ft long, which pack together for transportation in pairs. To this, a further two boards have been constructed, configured to take the railway round a gradual 90-degree curve that depicts the iconic Shap Summit scene, where the bankers drop off and the train engine fireman can put the shovel down, bang the injectors on and take a well-earned rest for the subsequent free wheel down to the border city…
Total construction of 'Hills of the North' took 20 months, making use of ‘Grantham’s’ (Graham’s other layout) fiddle yard to initially exhibit the layout; a purpose-built fiddle yard has subsequently been constructed.
Many are quite surprised at how short a construction time it was but I work on the basis that I only have one lifetime in which to get to complete my larger Carlisle magnum opus (of which 'Hills of the North' is a component part) and have consequently developed an approach that provides the level of detail that I am comfortable with, while allowing for fairly quick construction. First and foremost is the use of the Peco streamline trackwork system, with some subtle adaptations of the pointwork to capture prototypical track formations and alignments. To be fair, there isn’t exactly a lot of complex pointwork on my layout and the main scene past Shap Wells is just a plain length of double track. A subtle detail here is that it is all laid to the prototypical 11’ 2” track centres dimension, which scales out at approx. 45mm, as opposed to the more typically OO spacing of 50mm. To me, laying the tracks slightly closer like this makes a huge visual difference in seeking to convey the distinctive British look to a double track formation.
Eagle-eyed readers might also spot the use of foam ballast underlay. Undeniably a compromise to speed up the creation of the permanent way, it has a number of well-documented shortcomings, notably its eventual degradation. However, once again I have developed an approach to suit my purposes, chief amongst this being ‘spray before you lay’. This takes away the slight sheen and otherwise unconvincing colour of the foam as supplied and, as a by-product, the spray paint also provides a protective layer to natural UV light that is a contributor to the degrading process.
The use of the foam ballast has the further the twin benefits of quiet, smooth running (often commented upon at exhibitions), as well as replicating the neat ballast shoulders so typical of the steam era. A final task is to infill the central section with a similar colour ballast to complete the trackbed effect.
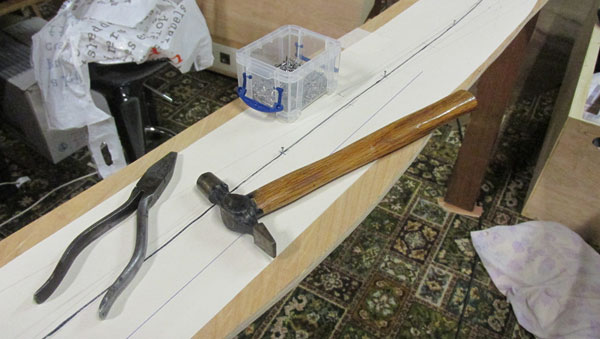
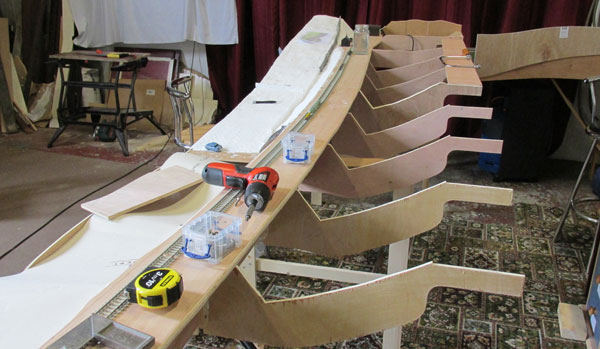
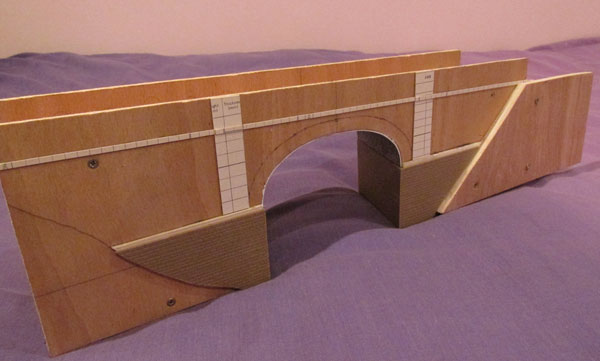
Aside from the trackwork, the creation of Shap was largely an exercise in carpentry and chicken wire and the following sequence of pictures illustrates aspects of the construction.
To read the completed layout article in full, plus get a history of how the iconic locomotives made it up one the most famous and arduous of climbs, read the March issue of BRM, available in shops from January 30th, or online today by clicking here.
1

2

3

4

5

6
7

8

9

10

11

12

13
14
15

16

17
18

19

20

21

22

23

24

25

26

27

28

29

30

31

32

33

See 'Hills of the North' in action at Model Rail Scotland in Glasgow this February or at the York Model Railway Show in April.
If you've been inspired by Graham, head to our Techniques section for a wide range of articles offering practical advice, from baseboard construction and weathering to kit building and scenery.