Adding telegraph poles and wires to a layout set in an era when they would have been part of the scene adds scale, height and an extra dose of realism. Instead of planting them straight from the packet, with a little effort you can easily add more detail to ready-to-use poles and make them reflect their location on your layout more correctly.
Here we look at how the poles can be modified, customised and painted to achieve an individual appearance.
1
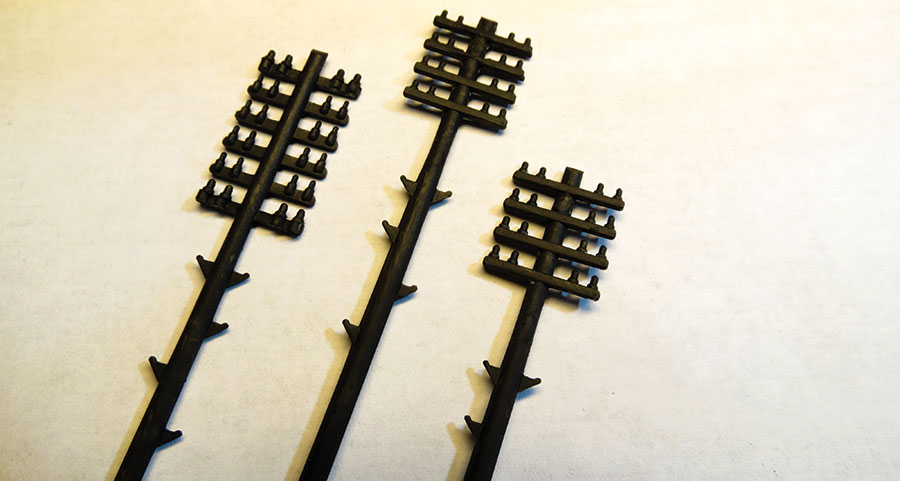
These are ready-made models. From the left – Dapol, Ratio, Express Models and Peco. The Dapol kit comes with extra arms if you need them, and Express Models makes a range of poles with different numbers of arms. We’ve used the two-armed model and their separately available insulators.
2
For a branch line, only a few wires are needed, we've cut the top of these Dapol poles off at the rebate in the moulding. The lower rebate has been filled with Milliput and filed smooth.
3
For a busier route we’ve added the two extra arms to the Dapol pole on the left. These are painted with a mixture of Wilko ‘Java Bean’ and black Acrylic paint.
4
A big improvement is simply to paint the moulded insulators white, and the edges of the step irons Humbrol Matt 87 to represent galvanizing. Where the arms needed support to prevent misaligned wires, metal strapping called combiners, or braces, was used. This is one arrangement. Paint some 0.3mm jewellers aluminium wire grey and superglue short lengths to the cross arms.
5
Where the telephone lines needed to branch off to serve another pole route, or building, cross arms were fitted at 90 degrees. File rebates in the pole for these.
6
Using the extra cross arm provided by Dapol, Cut away the moulded insulators, and superglue in some of the ‘J’ shaped insulators cut off the Express Models pole. ‘J’ shaped spindles were commonly used for this application.
7
Insulators are quite large, so to ‘beef up’ the moulded ones on another pole, cut 1.5mm long lengths of white insulation from 16 strand electrical hook-up wire. For Ratio poles, thinner, single-strand wire with a diameter of around 1mm over the insulation is about right. Before adding the ‘insulators’ the spindle moulding was painted grey.
8
Although newly creosoted poles are dark brown, in a year or two the wood weathers to a silvery-grey. We replicated this by dry brushing with Humbrol Metallic 53 ‘Gunmetal’. The side of the pole facing north could have some green/light brown added to represent lichen and moss growth.
9
Express Models poles are much finer, using what appears to be an etched fret for the cross arms. Remove the ‘J’ spindle insulators for plain pole routes and save for reuse.
10
As with one of the Dapol poles, add a cross arm at 90 degrees to the others. For this one use a piece of 0.040 x 0.040in microstrip, drill four holes 0.5mm diameter and reuse some of the previously removed ‘J’ insulators, before attaching the arm with superglue.
11
Detailed they may be, but no step irons are fitted. We tried fitting these two ways. For this pole, cut off the finely moulded steps from a Ratio pole and use superglue to attach them to the Express Models pole. We also tried making my own step irons from No. 10, or ‘Bambi’ staples.
12
Mark out and drill the pole with a 0.65mm drill and attach them with superglue. Although I made them as small as I could, they are still a bit large.
13
The completed pole with the arm painted brown and the steps grey.
14
This one has had braces fitted, an insulator added to the top of the pole using the separately available parts from Express Models, and the steps painted grey.
15
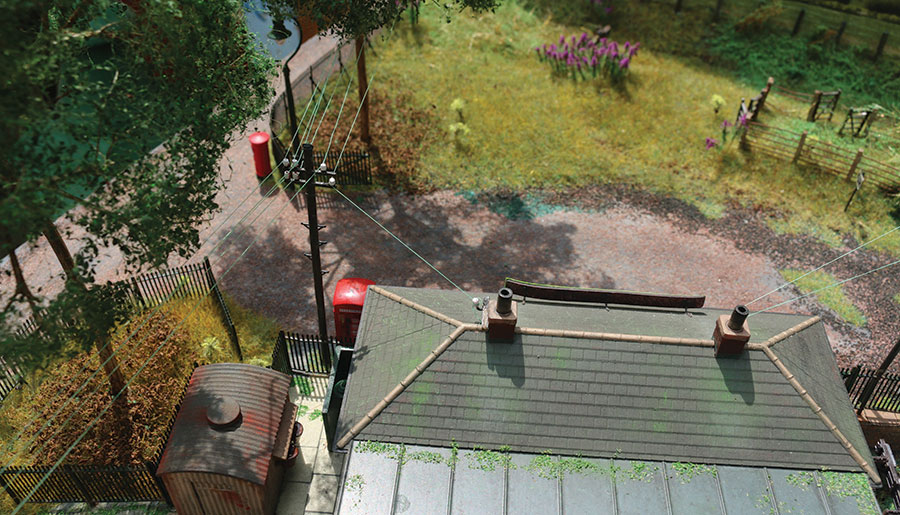
After ‘planting’ the poles on a layout, ‘wires’ can be added. We used fine, green E Z Line, a thin, elastic thread. The ‘wire’ is glued to an insulator at one end of the run with a tiny drop of superglue applied with a cocktail stick.
16
Once the poles have been ‘wired’, you can add staying wires to help keep the pole vertical. These should include a representation of the stay tensioner, which can be made from a piece of thin wire, folded in half and painted. The stay wires themselves can be made from thin grey cotton, or E Z Line.
17
Add some grass or weeds to the bottom of the pole, and your layout’s telegraph system is all set to send and receive messages!


 Add telegraph poles to your model railway


.jpg)
.jpg)
.jpg)
.jpg)
.jpg)
.jpg)
.jpg)
.jpg)
.jpg)
.jpg)