1
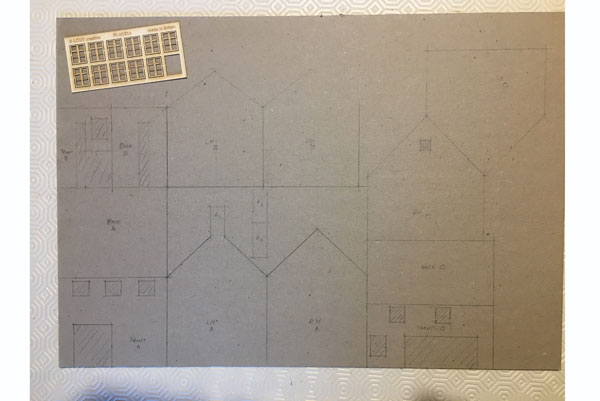
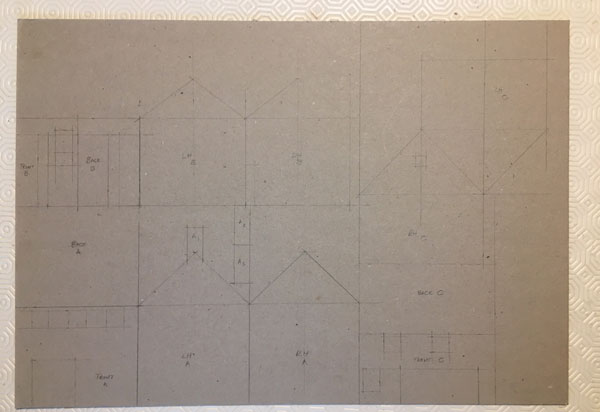
Spend a few minutes with the instructions, working out which parts on the plastic sprues are for each model. Most pieces for the platelayers’ hut are grouped together, but the roof is with components for other models. The diagram supplied is worth studying to get a feel for how the building goes together, it's not complicated, but you don't want to be trying to work things out once you've opened the glue.
2
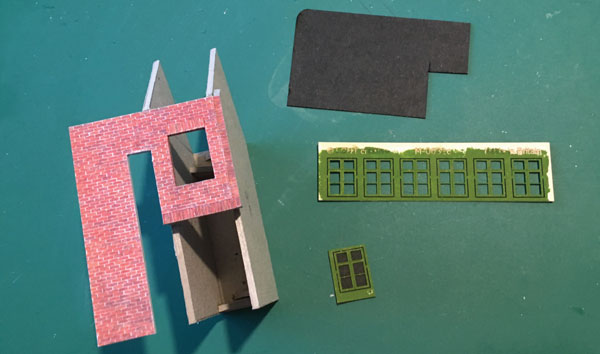
It’s a good idea prior to cutting to have windows and doors to hand so they can be cross-checked with the drawing on the card to ensure the openings are to the correct size before starting to cut. Allow a fraction larger - we allow 0.5mm in each direction for the brick paper/glue thickness.
3
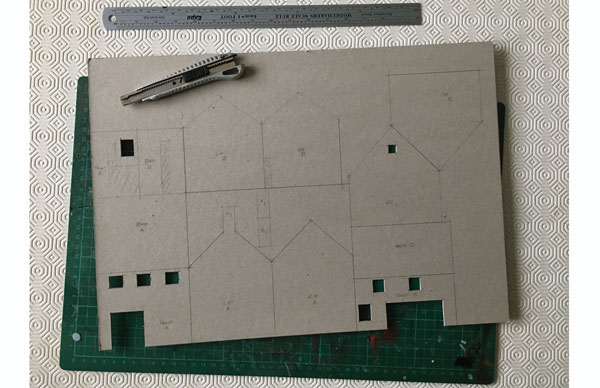
Shade the areas you wish to cut out because when you lay the rule on the card to start it is very easy to cover up where the cut is to be, and then use the wrong line.
4
A further tip is to try to cut on the waste side of the model using a steel rule as a cutting guide, if you slip and cut the wrong area it doesn’t mean going back to the beginning and starting again.
5
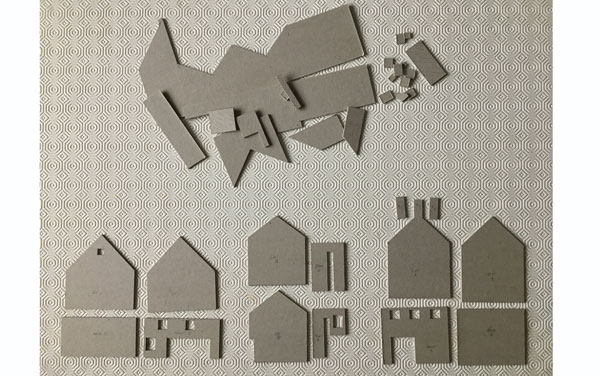
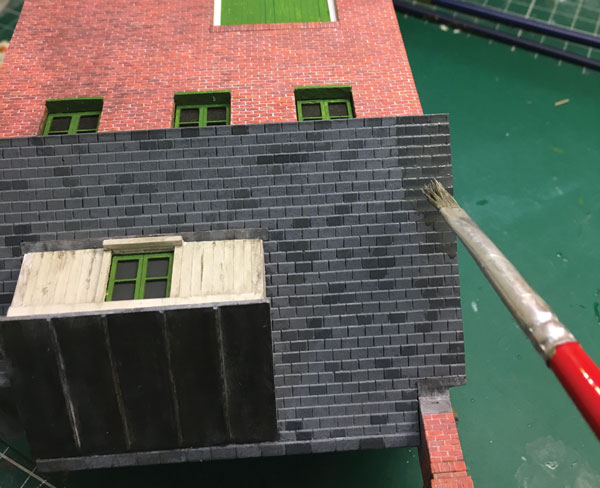
Cut out the openings first because the card retains strength, especially if one of the openings is near an edge of the building. The thinner the card, the more likely it will distort or break. Card blunts blade edges quickly, so the blades must be changed regularly.
6
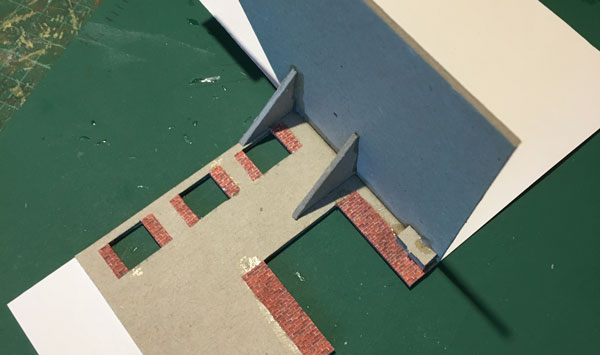
With the building pieces cut, consider the application of the wall finishes. One of these buildings will have brickwork, the other a rendered finish. Keep all the off-cuts because they are useful as strengthening pieces or braces for the corners.
7
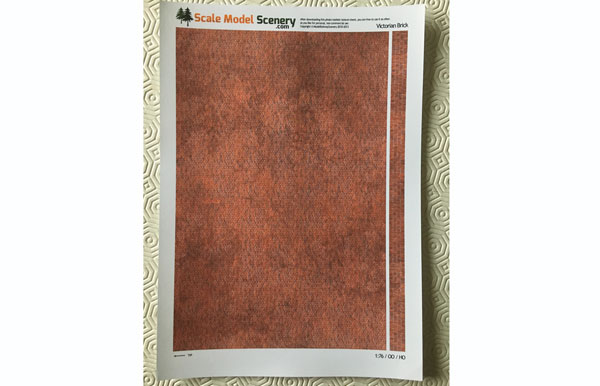
The brick paper used is Victorian Brick, from ScaleModelScenery.
8
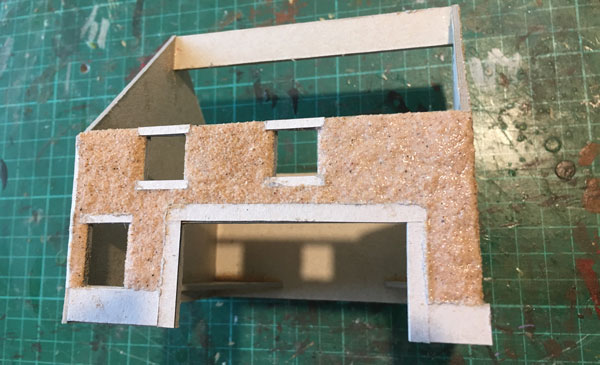
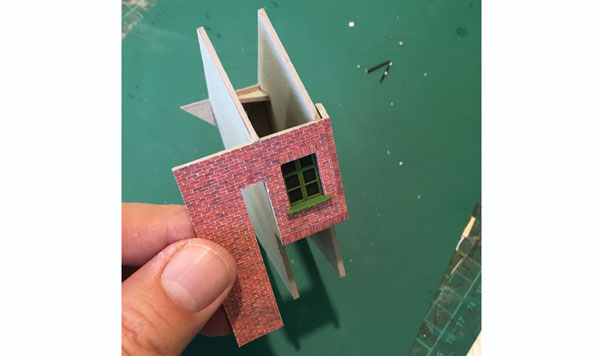
We have always found it easier to apply brick papers to the individual wall sections before constructing the buildings. When dressing brick papers around the reveals of openings, have the wall flat on the working board and commence with these elevations first.
9
To apply the papers, use a PVA adhesive, a flat brush to apply the glue and a steam roller to ensure all the air bubbles had been removed, allowing the paper to dry flat. When applying the brick papers make sure you have allowed enough for the next piece that folds around the corner.
10
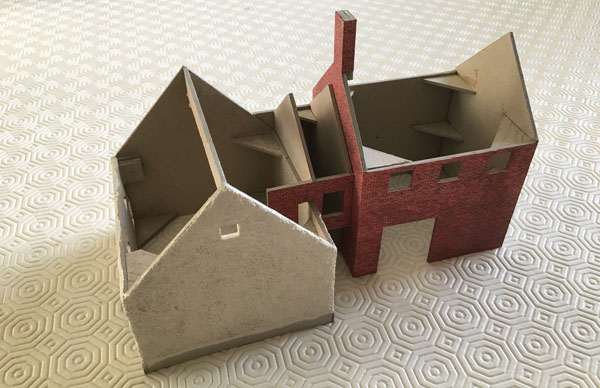
On the reverse side of the walls, scribe along the fold line of the reveal from one side to the other, using a pin vice with a blunt needle, then cut the brick paper in the centre of the opening.
11
Using a rapid set card glue, like Deluxe Materials Roket, fold the paper into the reveal and press the sides into the card edge.
12
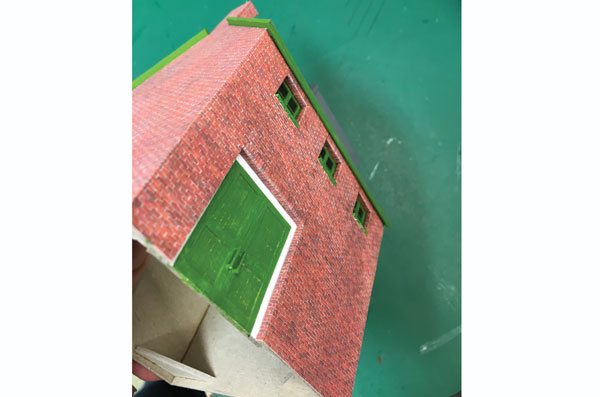
The end wall with a chimney was fitted and corner braces glued to support the wall to ensure it was square. When ready, score along the wall edge where the paper would fold, apply the glue and fold the paper over, pressing down hard to fix in place.
13
Setting it aside and weighing it down for a few hours allowed time for the glue to set. Food cans are useful!
14
It’s best to place exposed edges on the reverse side of the model where they can’t be seen. We used a brown felt-tipped pen to conceal these.
15
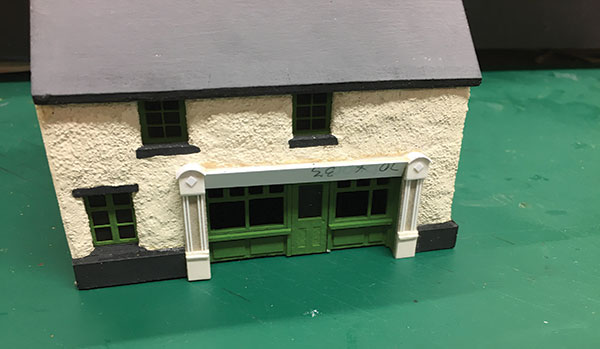
For the rendered building, the walls of the shop were laid out and background pieces of the approximate thickness of the render were glued to the top and bottom of the openings for lintels or sills.
16
I required the render to run around the corners. Unlike the previous brick building, this one was constructed first before applying the finish. It gave the corners a slight curved effect that I was after.
17
There are many pre-printed render papers, but these were too smooth. I used building sand that has been allowed to dry, then sieved to remove larger bits. The bits left from sieving were useful for the edges of paths, road or yards where the surface hasn’t been flattened by traffic.
18
A layer of glue was applied to the wall areas and sand was sprinkled over, including around the corners, making sure we didn’t overlap with the previous application. If sand ends up on the background pieces of card, remove them while still wet as they can be easily scraped off.
19
Once dry, apply two coats of cream paint on the walls to seal and colour these. Use a slightly stiff brush to apply the paint in vertical stokes from top to bottom as this gives an uneven finish. The infill building section linking the two previously detailed builds were made, using the same techniques.
20
The windows were from the LCut range and were painted before installation. Each window was cut out and carefully fixed to a piece of mottled black card. I rarely model building interiors because they are largely hidden when no lights are on.
21
When the window was fixed in place, the sill detail was cut from the waste sections of the LCut fret and fitted to complete the installation.
22
The office doors were constructed the same way, but in addition the black sheet was glued to a piece of 2mm greyboard to stiffen the construction.
23
To construct the industrial double doors, I scribed plank details on the greyboard first, then built the surrounding framework. The door handles were cut from spare LCut windows.
24
A sub-roof of 2mm greyboard was installed. This strengthened the model when handling and acted as a soffit, fascia and bargeboards when painted. Prior to gluing, the undersides and leading edges of the sub-roof were painted the required colour because it was easier at this stage.
25
We painted the roof slopes in slate grey emulsion to make them stand out when checking alignment and design. The brass door handle and letterbox came from the Scalelink (SLF133) Door Furniture fret.
26
The corbelled effect was made from layers of thin card, cut to the required brick course size and glued over the brick paper. Four lengths of brick paper to suit four courses were added, the edges were coloured brown, then glued to the card ensuring it is square.
27
Card templates cut to fit the roof slope were useful. It made cutting the slates easier, rather than throwing away a piece of Wills sheet because it wasn’t cut correctly.
28
We cut the Wills roofing sheet with a strong craft knife, trimmed it ready and offered it up to check alignment before fixing. To improve the appearance, file the sides to give the visual appearance of stepped tiles down the slope. A simple task, but visually-effective.
29
When happy with the fit, glue the tile sheets in place using Roket Card Glue. This dormer window was a clad inscribed card. Its card roof had micro rod glued every 1cm to represent a lead-covered surface.
30
To represent lead work, we used Vallejo Gunmetal Grey with a little White added ad hoc, to give an uneven colour. This was followed by Lifecolor Roof Dirt, painted down the joints and finished with a thin wash of the same colour to age. The chimney pots were from various sources – Dart Castings, Wills building pack A, and Langley Models. These were painted in Lifecolor Old Brick with a wash of Vallejo Black Grey to weather.
31
The slate roof received a coat of Slate Grey acrylic paint. Using a mixing tray and the same Slate Grey as a base, various darker and lighter shades of grey from Vallejo were added and individual tiles painted a random pattern. When dry, Lifecolor Roof Dirt was applied and left to run over the tiles into the tile joints.
32
To construct the shop front, we used items from the LCut range. Though we don’t normally model building interiors, in this case the result looked better with the addition. We used the greyboard as a base to strengthen the framework.
33
A few coats of Vallejo Olive Green were used to represent the company colours, and the finished frame installed into the wall opening. The shop front facade was built using greyboard, microstrip and thin card.
34
The plain tile roof was painted with Vallejo Basic Brown, then a mixture of Vallejo Black and Beige Brown was mixed to the Basic Brown. The colour varied with each application and individual tiles were painted random colours to give tonal variance. To further enhance the appearance, Lifecolor Old Tile was painted on selected tiles and leading edges to represent clean tiles.
35
We used guttering from Wills Building Pack A. Each elevation of guttering was cut to length with the cast brackets trimmed and varied in spacings to suit the length required.