What's the most famous street in Britain? Coronation Street, of course. When you think of this, what do you see in your mind? Row upon row of terraced houses. Terraced houses should be common on many urban model railway layouts, but they aren't easy to make. The problem is that all those houses have to look the same. The modeller is faced with a repetitive, batch-building process, knowing that a deviation from the basic design will stand out like a sore thumb. If you get it right, people won't appreciate the individual models you have painstakingly built either.
This is the perfect subject for a simple kit. Most of these models are placed along the back of a layout, so you don't need great detail. Quick and simple assembly and a reasonable appearance are enough – this is where the new BRM kit fits in.
Unfortunately, you can’t buy this kit anymore, but the techniques and assembly tips in this article are transferable to any laser-cut kit.
Content continues after advertisements
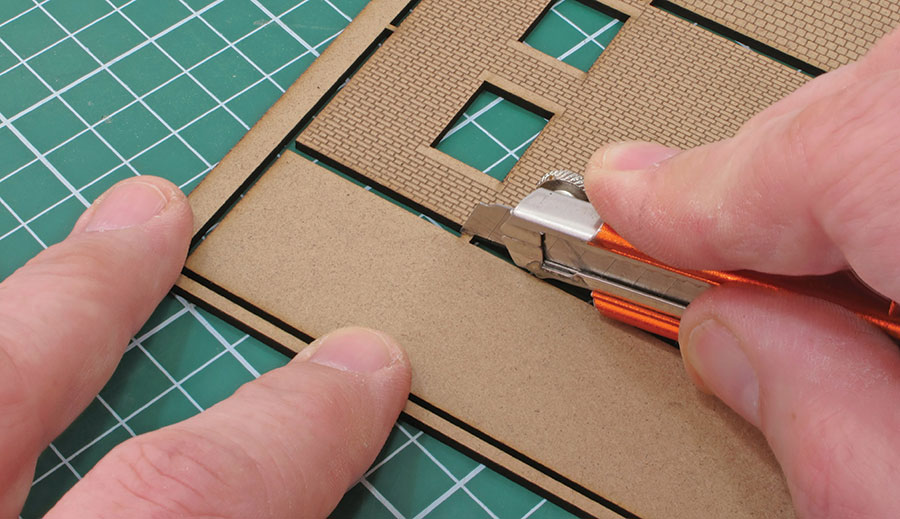
1
The main parts of the house are laser-cut in 2mm thick MDF. Using a heavy craft knife, cut through the tabs that hold them in the fret. Don't try to get too close to each part while cutting, leave a little of the tab to avoid damaging anything.
2
Use an abrasive stick to remove any remaining bits of tab. It's not a bad idea to lightly sand all the edges as these are blackened by the cutting process, which can show through the paint later on. A very fine abrasive will clean this up without leaving a wobbly edge to the part.
3
The main parts assembled. Put the ends on first, then build the inner support structure. Note that the inner ends are rectangles, so make sure they go in the right way around, or they’ll stick out of the back of the building. Test-fitting the bits together without glue is a good idea if this is your first building.
4
Lasers can't cut angles, so the bottom of the chimney front must be sanded to the same angle as the sides, or it won't sit on the roof.
5
Paint the walls a mortar colour, we used Humbrol enamel 121, and let it dry. Then, dry-brush the brick faces with Humbrol 70 Brick Red, applied with a wide brush held at a shallow angled to the wall. Slight colour variations look more natural.
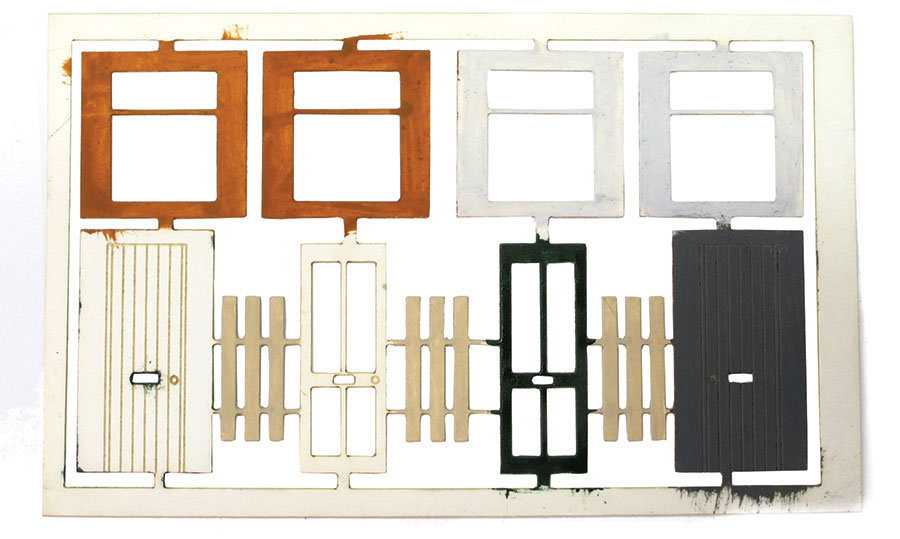
6
Windows and doors are supplied cut from thin card. Painting the parts before removing them from the fret is a good idea. Be careful not to use too bright a white (we use Humbrol 147, pale grey) for steam-era layouts. White paint for domestic use didn't appear until the 1960s and would weather quickly. UPVC windows, which stay cleaner, arrived over a decade later. Before this, window frames were mostly made of wood.
7
The front doors are reversible. One side is a humble planked door, but flip it over and add the panelled piece, and you have a more upmarket version. Use the holes for the letterbox to align the two parts.
8
Inside, we're glazing the windows with a bit of scrap plastic packing from a punnet of grapes. Curtains are strips of paper cut from a magazine and fixed to the back of the plastic. If you think your residents would like net curtains too, use thin, white tissue paper inside the coloured curtains.
9
You can block the view into the building by gluing a piece of black card behind the glass. A gap between the view blocker and the glass looks more natural. These U-shaped pieces are from cereal packet card. Colour the visible part with a marker pen. Slight variations in the colouring suggest an interior even when one isn't fitted.
10
To simulate the guttering along the front of the roof, sand the bottom edge to a curve, then paint it black.
11
The basic roof is etched with a slate pattern and can be painted with dark grey (Humbrol 69) then dry-brushed with a lighter shade (Humbrol 66). If you prefer, there are stick-on tiles available from Redutex, or you could cut individual slates from paper and stick them in place one at a time using the etched lines as a guide
12
If you have put the chimney in position perfectly, ignore this, but the rest of us might have a little gap around the bottom. Hide this with lead flashing modelled using 3mm wide strips of cigarette papers, painted grey.
13
A length of wire painted black and bent at the top makes a good drain pipe. We're using copper wire, pulled straight in a vice, but green plastic-covered florists' wire is also good for the job.
14
If your taste runs to stone-cladding, there are many different surface materials you can use. Plastikard will work, but needs painting. We used Volmer embossed card which is self-coloured.
15
Pebble dash can be made using Rust-oleum Desert Bisque textured paint. Spray from a distance and use thin coats. Do this before you fit the windows and doors. The result is very effective.
16
The roofs of steam-era homes were dirty, especially around chimney pots because of coal fires. A dusting with weathering powders is perfect. Humbrol Smoke is ideal. Don't worry about sealing the surface - you're not likely to be handling the model much once it's in place.
Want some houses to complete your scene? Our guide on how to build and detail a card kit is worth a read. Or if you’re interested in building some roads and pavements, our handy guide is filled with tips and advice.
For more help and tips for adding grass to your model railway - watch our video on how to create realistic scenery using static grass here.
And what about trees? Our online guide will help you get to grips with ‘planting’ trees on your model railway.
Need more advice? Take a look at the BRM Techniques page for all our latest guides and advice articles.