Sometimes I get to live the dream. My first serious layout was a model of the Cawood, Wistow and Selby light railway, inspired by the book of the same name written by K.E. Hartley. Built over three decades ago, the rolling stock was a bit of a mish-mash of RTR and early attempts with plastic kits.
At the time, there was one piece of motive power I really wanted to build, the Sentinel Railcar Trafalgar, which briefly ran on the line. A kit from Nu-Cast was available, but there was no way my pocket money would stretch to it, and, if I'm honest, I didn't have the skills to do it justice.
A few years ago, Branchlines and South Eastern Finecast re-introduced some models from the long-defunct Nu-Cast range. Moulds were refurbished and modifications made to accommodate more modern methods of motive power. Suddenly, one of my dream kits was back on the market.
In theory, a whitemetal kit build shouldn't be much different to a plastic kit. The cast parts can be glued together just like bits of an Airfix Spitfire. Sadly, this isn't always the case. The soft metal requires great skill to get the best from when designing parts. For a start, as it cools, it shrinks. Special rules are available to calculate this, but, ultimately, you rely on a skilled craftsman taking all the factors into account to produce a good kit.
Builders need to handle the metal carefully, too. It's very soft and bends easily. Sometimes this is helpful – bent parts can usually be re-shaped with nothing more than your fingers, but checking at every stage that a component is straight needs to be part of the build.
It's worth remembering the age of this kit. In the same era, many real horrors were produced, but Nu-Cast always had a good reputation so there aren't any deformed lumps of metal to be carved by the modeller to fit for a start. Old kits can sometimes be more sculpture than assembly!
The castings are commendably clean. Aside from a few nibs to be removed from the larger items, the remains of metal feeds in the mould, nothing needed more than a light scrape to remove moulding lines. There are signs of age – those moulded-on handrails beside the doors would be better replaced with wire. The steps are a bit chunky, too, but need to be thicker than prototype to stand handling. Modern kits would normally include etched parts, but this dates from the era before multi-media kits were 'the norm'.
Sadly, none of the railcars survived to work in British Rail days, but Number 2136 wasn't withdrawn until February, 1948.
More importantly, it was named Hope and we all need a little bit of that nowadays, so that's the prototype I've chosen to model.
The biggest surprise, according to the book – and the railcar I really need – is the NER petrol-electric Autocar. When I had the layout, you couldn't imagine that someone would produce a kit of a prototype that odd. Now an RTR model is on the horizon from Rails of Sheffield.
How times change.
Shopping List
South Eastern Finecast
LNER Sentinel Steam Railcar kit and Tenshodo SPUD power unit.
www.sefinecast.co.uk
Phoenix Precision Paints
P53 – LNER Coach Green (Tourist Stock)
P64 – LNER Coach Cream (Tourist Stock)
www.phoenix-paints.co.uk
Historical Model Railway Society
LNER gold locomotive and coach insignia transfers
www.hmrs.org.uk
1
Open the box and you'll find many whitemetal parts, the smaller ones carefully bagged up. The good news is that duplicates of the more delicate components are included in case you damage them – very thoughtful on the part of the manufacturer. Not shown are the glazing strips and vacuum-formed seating.
2
First job, drill out the pivot for the trailing bogie and insert a self-tapping screw that will act at the pivot. You need a good selection of drill bits for this kit, but the instructions are very clear on which one to use and where.
3
The castings are pretty clean, but there are a few moulding 'nibs' along the sides of the chassis that need to be filed away carefully. Study the diagrams, so you don't also remove the raised squares used to position the steps later in the build.
4
I suspect, due to a limitation of the casting equipment, the sides, chassis and roof are moulded in two parts and have to be joined. Starting with superglue, the parts are tacked together and, once happy with the alignment, two-part epoxy glue is forced into the joint and it is left to harden overnight.
5
To ensure perfect alignment, the sides are assembled against a metal rule. It's really important the bottom edge is flat, or the sides won't sit on the chassis later.
6
The railcar ends aren't identical – the difference is the glazing bars – one window doesn't have them and this is handed. It's clear on the instruction diagram, once you spot what you are looking for. Fit both ends and one side. If you're using glue, let it dry so that parts stay in alignment.
7
Assuming everything is in the right place, add the other side and the two partitions. By this point, I switched from glue to solder as it's quicker, but if you prefer adhesive, there's nothing to stop you using it.
8
The two halves of the roof had slightly different curvatures, something common with whitemetal. Gentle bending with nothing more than finger pressure sorted this out and then the halves could be joined.
9
Holes for the ventilators are drilled out. The bit can get stuck in the soft metal. Water is an excellent lubricant that won't leave residues to ruin the paint finish.
10
There are many fittings on the roof. Feeling that the lines were a little faint, I re-scribed them while I was working on it. We tend to see the top of our models, so it's worth taking plenty of time on it. I've fitted four catches to the doors. Some railcars had only two, but I couldn't see how many I should have, so decided four offered better value for money from the kit.
11
Moving underneath, the vacuum cylinders and battery boxes are attached. Filling the backs of the boxes in with some plastic later will look better when the model is viewed from eye-level.
12
The instructions suggest that the gearbox will prevent access to one of the screws holding the plate that supports the powered bogie and that it should be held in place with Blu-Tack. I didn't fancy this, so drilled a hole in it to let the screwdriver see the bolt head. The hole will be invisible when the model is on the track.
13
Inside the model, a pair of bolts are soldered to a brass plate and then this is soldered (or glued) to the chassis. No plate is supplied for the rear bolt, but once the brass is tinned with normal solder, the low-melt holds it to the floor perfectly.
14
A dry-assembly is required for the trailing bogie as I found fitting brass bearings made the axles too wide for the stretchers. Of course, by the time I realised this, I'd glued them in. Drilling the brass to provide a deeper hole fixed this, but had I realised, I'd just have left them out.
15
With both power unit and trailing bogie fitted, the railcar should sit as level as the track it's placed on. If not, thin washers are needed to raise the low end. My model was fine in this respect, so I'd expect others to be similar.
16
Power is provided by a Tenshodo SPUD. Removing the bottom plate with a small screwdriver allows sideframe carriers to be clipped in. The sideframes are then glued to these – be careful they aren't too wide. I forgot to check and had to take them off and file these back allowing the bogie to swing under the body without clouting the steps.
17
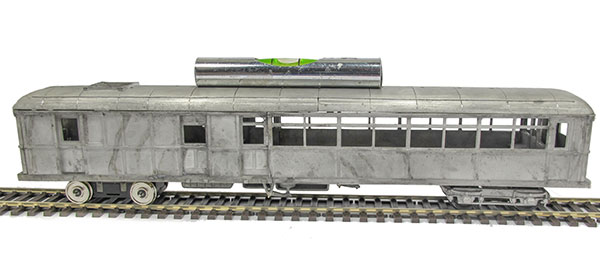
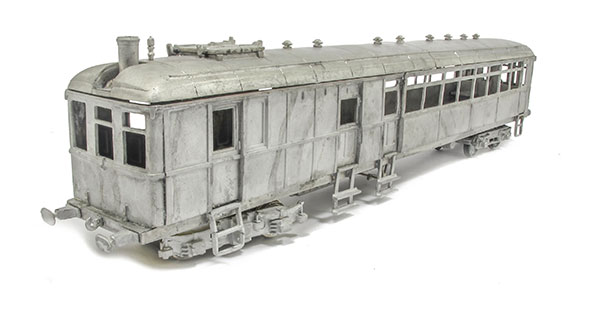
Steps are added and the model is ready for primer and paint. At this stage, the roof isn't clipped on properly, hence the gaps. Leaving it loose makes painting easier and fitting an interior possible.
Content continues after advertisements
More information
If you enjoyed this practical feature, you'll find a whole host of great practical advice and step-by-step guides in our Techniques section here.
Related articles
How to animate a shunter
How to build a battery locomotive
How to build your first shunter
How to adapt Hornby's Salt PGA wagons
Your weekly World of Railways newsletter
Are you subscribed to our weekly email newsletter? Don't miss the latest news, reviews, modelling advice and competitions.