07 September 2021
|

With the reappearance of the ex-DJM models J94 as part of the EFE Rail range, we take a look at how the popular locomotive can be lightly customised.
There are an awful lot of 4mm scale J94s out there and while it might be tempting to leave your lovely new model in pristine condition (OK, we are using a factory weathered model, but you know what we mean), it will look the same as the same loco on every other layout. At the very least, a steam locomotive should have a crew and so that's where we start.

There's not a lot of height in the cab so it's important to check your crew fits inside before you go to the bother of painting them. A 3D-printed version of Howard is too tall for a start. I did consider cutting his feet off, but decided he'd probably complain.

A set of whitemetal crew from Monty's Models is a much better fit, although they do need to stand toward the middle of the cab where there is a little more height. Since they will be largely hidden, I give them a quick coat of paint, followed by a wash of shading ink. Sticking their feet to a lolly stick with superglue makes handling them while painting a lot easier and they can be released with a sharp knife blade. The less said about the fireman's black eye (I blame the shading ink) the better.

68012 was a Cromford and High Peak engine and, in some prototype photos, sported a pair of wooden shutters at the front of the cab to protect the crew from the weather. A couple of pieces of 0.5mm thick Plastikard, 9mm by 11mm, scribed and painted to look like wood replicate this. The fittings were pretty crude in real life, so it's important not to be too neat when modelling for a change.

To cover the plastic coal, the real stuff is crushed with a big pair of pliers and then fixed with watered-down PVA. Looking at prototype photos, there was often a pile on the back of the roof, presumably from careless work with a digger when loading up. I doubt this survived long once the loco was running, but it might be fun to replicate.
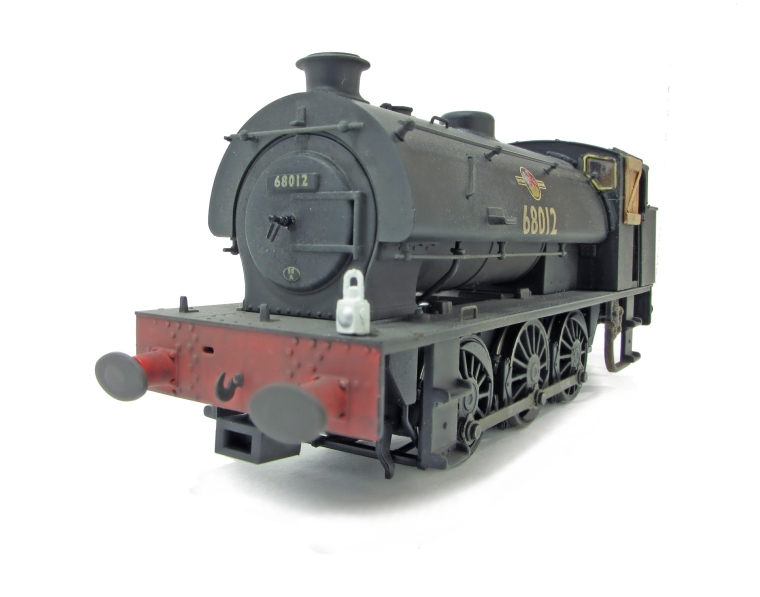
Another prototype touch is a lamp on the front buffer beam. None are included with the loco, so I found a set of Hornby accessories. The lamp on the bunker has it's lens painted red. If you are keen, these can be fitted with Blu-tack so they can be removed as required, but ours are permanently fixed with superglue so they won't fall off on the layout.

Although the model is supplied weathered, I like to add a bit more grot using weathering powders. Around the smokebox, there's usually a lot of rust where the heat has burnt off the paint, and ash from cleaning out the boiler. As well as colour, these have texture so you need powder rather than paint to model it.
We are often asked if you need to seal weathering powders on the model, and the answer is no.
Most powders are sticky enough when applied to matt paint to cling on pretty well. The J94 paint is quite smooth so, for a really filthy locomotive, a coat of matt varnish before weathering might be a good idea. After that though, leave it alone.
If you handle the model enough to wear the powder away, the first areas to come clean will be the same as those on the prototype that would be washed by the rain anyway, so the result can look even more realistic.
Another issue is that the colour of the weathering will change if you spray it with varnish or fixative, possibly ruining your work.

Where the crew clambers around their machine, the paint will wear away and the steel shine through. Dry-brushing areas such as steps and handrails with Humbrol Metalcote gunmetal just brings a little shine to them. A little rust might be appropriate if your crew aren't active enough to keep the metal polished.