31 January 2022
|

Finding a suitable lost key for clockwork models can prove difficult. Here’s a guide on making a replacement.
Produced by Meccano in 1965, this O gauge set featuring Percy from the Thomas the Tank Engine series of stories is popular with collectors as it only appeared in this for a few years.

Really good examples of this set command in excess of £60 – this one with its battered box was less than half that price in an online auction. Bought to run rather than look nice, the biggest problem is the ominous empty section of packaging just above Percy's chimney. There should be a key in there, and without it, Percy won't be running anywhere.
A quick test using a pair of pliers to wind the mechanism proved the model worked, but pliers aren't a convenient long-term solution.
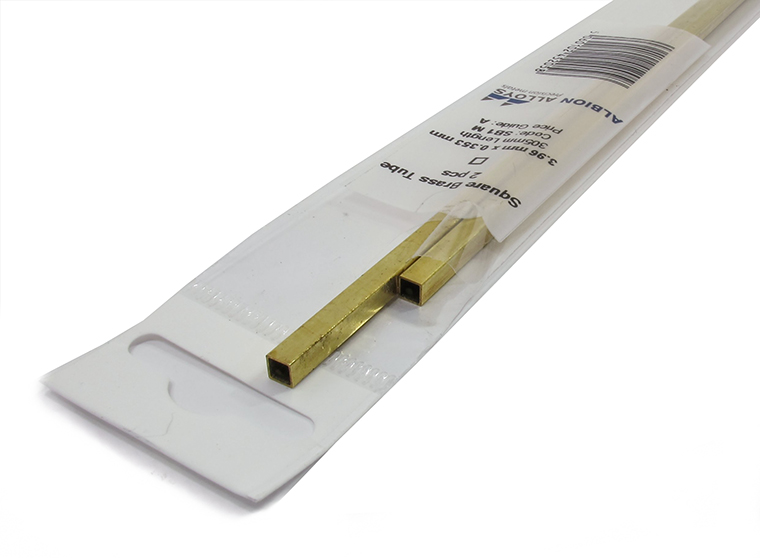
Measuring the winding arbor (the steel shaft the key fits on to), showed it to be 3.1mm wide. Some 3.96mm brass tube from Albion Alloys is a perfect fit (the measurement is the outside width) on this. For other models, you need to experiment a little, a Hornby Dublo arbor is 2.4mm wide for example, but the tube is available in other sizes.
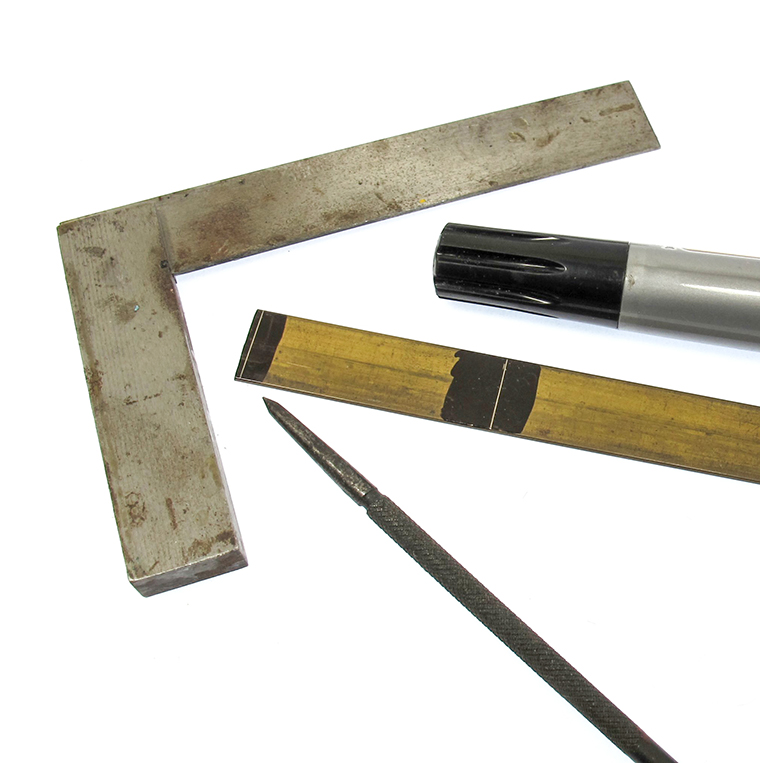
You need a head for the key (the wide bit) and we used a bit of scrap brass 1.5mm thick. Albion Alloys sells some 1.6mm thick which would be perfect. Marking metal for cutting is made easier if it's coloured with a permanent marker before scribing. Engineers often use a product called 'engineering blue' for this job, but markers are cleaner and easier.
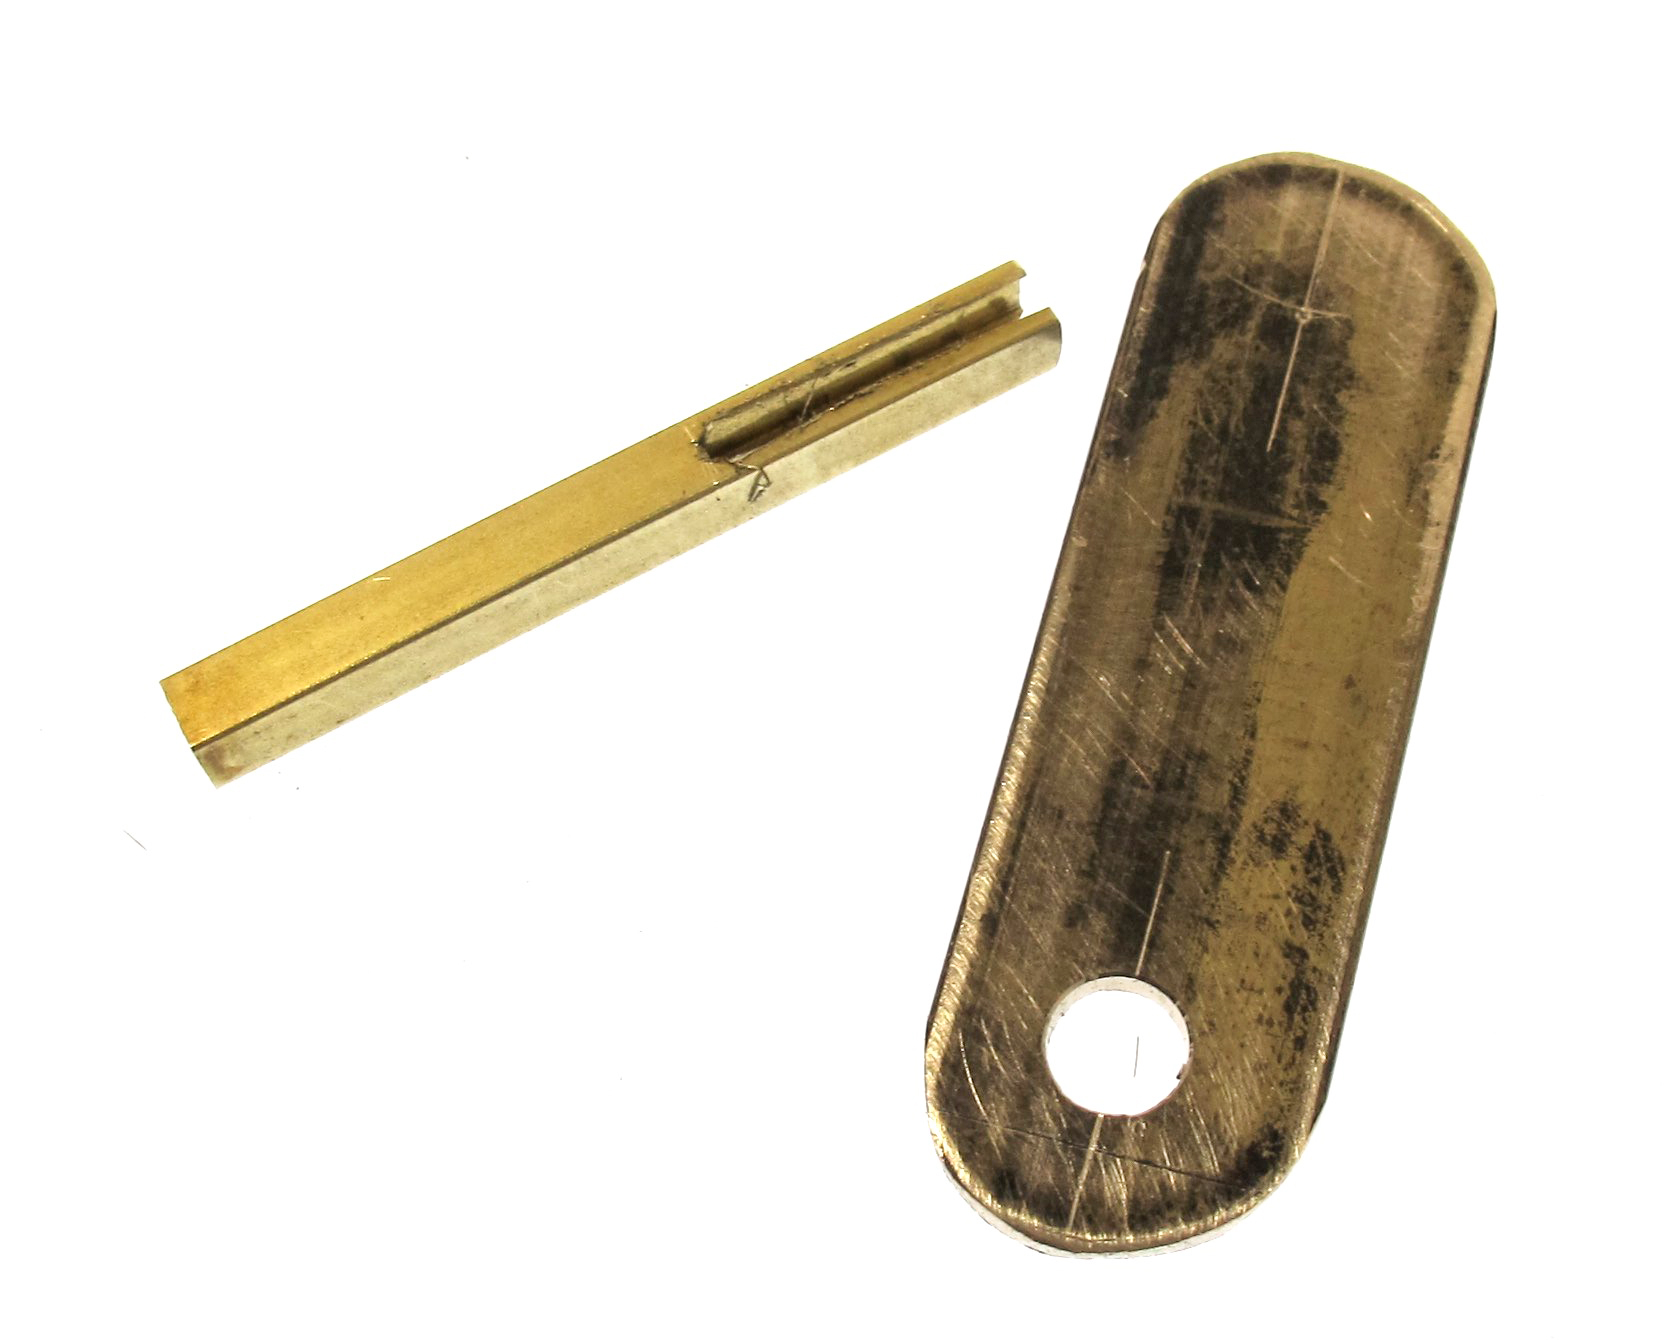
The head is cut out with a small saw, then shaped with files. A hole in one end is a traditional feature and allows the key to be attached to string so it doesn't get lost in the future. The shaft, 40mm long so the head clears the valve gear when winding, has a slot created in it using a cutting disk, and then some needle files. The two need to slot together nicely – we want this to look good as well as work well.
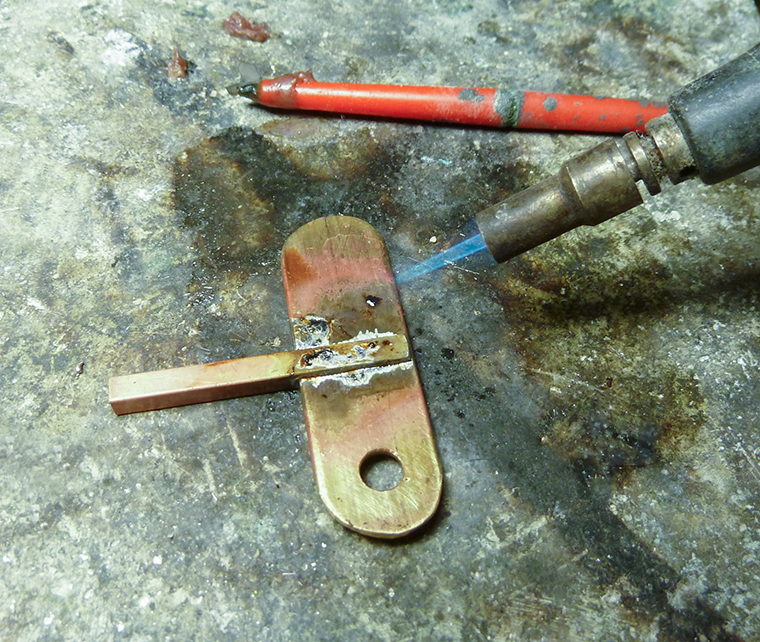
Both pieces need to be cleaned up with fine abrasives, then soldered together. The brass will absorb heat readily, probably too fast for most soldering irons to cope with, so a small gas torch is a better bet. Plenty of flux is needed and we used normal electrical solder. The results aren't pretty, but we'll clean those up with files and abrasive paper later. Once soldering is done, leave parts to cool as they will be finger-burning hot for some time!
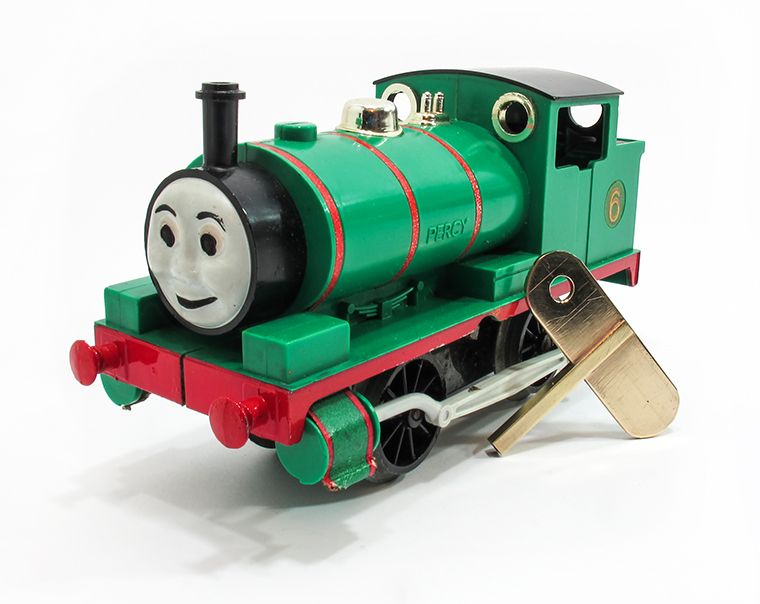
After a bit of polish, the finished key looks great, and works well.
Your weekly World of Railways newsletter
Are you subscribed to our weekly email newsletter? Don't miss the latest news, reviews, modelling advice and competitions.