Like many model buildings, choice is as varied as the opinion from modellers on what is the most suitable media to use. If using multiples of a building, I think it’s important to stick with the same type for appearance. If you can scratch-build an item, ensure you maintain the consistency across multiple buildings. If using a ready-to-plant resin building with relief in the stone walls, avoid placing a flat-sided card kit adjacent. This is where you become an artist, arranging your model composition for best visual effect.
Pushed for time with a layout build, this multi-media kit from Scale Model Scenery was sourced. These can be made into impressive-looking models – the paper, card and Perspex sheet design lending itself well to the smooth, flat-sided nature of these buildings. For a more textured object – a brick wall, for instance – I’d have opted for embossed plastic sheet.
Your choice of modelling media should be flexible. Observe which works best for a given subject and don’t be afraid to mix and match. Embellishing your latest card kit with styrene or brass details is perfectly acceptable, too. So long as you avoid clashing details and remain consistent throughout, you’ll be on the right path.
Content continues after advertisements
1
Scale Model Scenery produces many kits, but I wouldn't recommend its (KX041-OO) 1970s Portable Office Building as your first. Results can be excellent, though a wise first move for best results is to practise with essential techniques on a less-involved kit.
2
Handily, as with all kits from this manufacturer, comprehensive instructions are included, in colour. These easy-to-follow and numbered steps make assembly easier to understand.
3
Unlike some card kits, this kit requires printed paper parts to be cut and glued to laminated card pieces. Using a fresh blade in a craft knife, I cut through the tabs holding parts in situ.
4
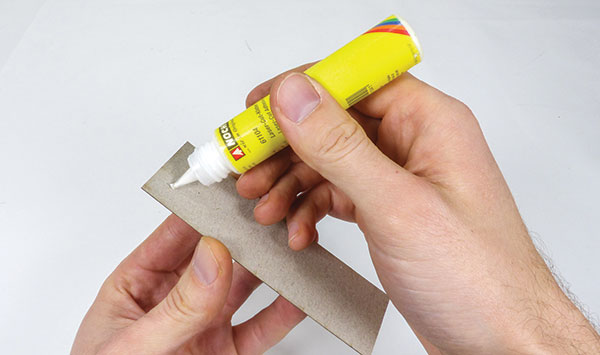
Glues for card kits are varied. Some use PVA, others a multi-purpose adhesive such as UHU. I’m using Noch’s rapid-drying laser-cut (61104) glue. It dries quickly, so work swiftly to prevent lumps.
5
Card pieces are laminated to form a superstructure onto which the glazing, then paper, is glued. To prevent parts from warping as the glue dries, a glass acts as a weight. Parts can be gently flexed to straighten, if needed.
6
Internal walls are provided with the kit, should you decide to lift its removable roof to detail the inside. The window aperture flaps are cut diagonally, working from the corners, inwards. Using a steel rule and cutting mat, it’s simple work.
7
The black-printed windows are cut from the printed sheet, from the corner angles, working inwards. Keep cuts straight for appearance. Cutting windows is optional and the windows can be left as printed, if desired.
8
The Perspex sheet provided has printed window frames to aid with alignment. These have printed light weathering, too. The sharp edges of the steel rule can scratch, so I’m cutting these with scissors.
9
With Perspex sheet and outer wrapper glued, the components are left until dry. Some warping might be observed, in which case, parts should be gently twisted back to shape.
10
Final assembly is rapid, and hiding corner joins is most of the battle. For this, the order in which components are glued, and to which end, must be carefully observed.
11
A black marker pen can be used to hide the edges of the paper. The same technique is used for the side supports where the card is coloured using a few coats of the felt-tipped pen. Paper kits are difficult to rectify if damaged – patience is key.
12
With roof lifted, the vinyl blue flooring and ceiling panels are easily seen – reasons for me wanting to detail and add lights inside, later. A day's enjoyable modelling.
Want some further buildings to complete your scene? Our guide on how to build and detail a card kit is worth a read. Or if you’re interested in creating some roads and pavements, our handy guide is filled with tips and advice.
Need more advice? Take a look at the BRM Techniques page for all our latest guides and advice articles.


