A couple of years ago, the nice people at Rapido Trains asked me to build a layout for them. The micro project, 'Didsbury Green' and I were then flown to Canada where I enjoyed the challenge of repairing the in-transit damage before showing it and then giving the model away.
Now, they are back with another challenge. To celebrate the firm's growing range of West Midlands buses, a suitable scene is required to display them. Head Honcho, Jason Shron, fondly remembers his time in Selly Oak (yes, really), and so it was decided that this would be our inspiration.
Central to the layout is the Bristol Road. This passes by the station, so we can ignore that, but runs under the railway before climbing to cross the Worcester and Birmingham canal. There will be trains, but mainly buses, so I need to allow the maximum space for Guy Arabs full of Brummies on their way to work.
After drawing up a few plans, we agreed on a design for the model that uses the railway as a background. It conveniently runs on a series of embankments and viaducts, so provides a view blocker that saves my trying to model most of Birmingham.
To fit a sensibly-sized baseboard, most of the prototype features are moved around a little. In real life, the road and rail crossing are at quite an acute angle, but this has been reduced on the model. Some areas of the site have also been shrunk as they don't provide space for a bus.
Anyway, the centrepiece is that rail bridge, so it's the obvious place to start the construction of the model. Put simply, if this doesn't look right then we are wasting our time. With this in mind, I took a trip to take some photos of the prototype. And then another a couple weeks later to fill in some blanks as I got to know the site better.
Bridges are generally bespoke pieces of architecture. While there will be elements common to many sites, each presents its own challenge, all of which means there wasn't any chance of finding an off-the-peg solution. I was going to have to build this one the hard way, from scratch.
At first sight, this appears daunting, but while the bridge might have a lot of components, most are simply repeats of a small selection. There are 13 ribs on each side, for example. Work out how to make one, and the rest is easy.
In an ideal world, the bridge would be drawn up as an etched kit, but that's beyond my capabilities, so I'm happy to use plastic sheet, which is easy to cut and glue. Available with many surface finishes such as bricks and rivets, it's a very adaptable material. When Slater's introduced Plastikard in the 1950s, they revolutionised the hobby, providing a cheap and flexible material for constructing all sorts of models.
One thing a project like this does eat is time. Time to study prototype photos. Time to carefully work out how to turn these into a model and then more time to build the said model. The main bridge is easily a couple of full days' work, so when I came to look at the canal bridge, I thought I'd find a quicker way. As it turns out, I was wrong!
Road Bridges
1
Selly Oak rail bridge. Built in 1931, it's a pretty common design that can be found in many locations. Nowadays, painted in a heritage colours scheme, to which the local youths have added a few embellishments, it's a lot prettier than in the days of steam or blue diesels.
2
I like a solid trackbed, so ordered a 105mm wide strip of 3mm plywood from my local wood shop. As you can see, the underside where it crosses the road, I'm giving it a few coats of sanding sealer to hide the grain. Sanding with a fine abrasive between each one eventually gives a glass-like finish.
3
3mm equates to under a foot depth in 4mm scale, far too thin for a trackbed, so I add a sheet of 5mm thick foamboard to build it up. Of course, if I'd just ordered 9mm thick plywood in the first place, I'd have saved myself a job.
4
One Sunday morning, I paced out the road. It's 28 steps wide, which becomes 112mm on the model. From this, I work out the width of the bridge itself and mark this out on some 2mm thick plastic sheet. The ribs are then deduced from this, so I end up with the correct number and, I think, something like the correct spacing. On the basis that it looks right, it is right.
5
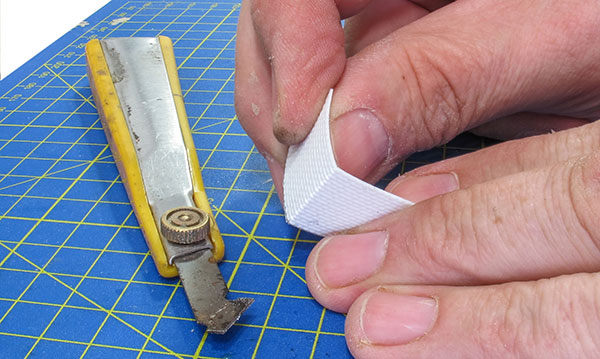
This model needs a lot of 2mm wide strips of 0.5mm thick plastic. Rather than buy strip (the shop was sold out), I mark the width by running a pair of compasses along the edge of a sheet, producing a groove to follow with a knife. This is much more accurate than trying to measure with a rule.
6
This is the time-consuming part. Each rib has three components to be cut to length, tacked into position with plastic cement. Once in place, they're washed with solvent to fix them. I check each rib is square and vertical as I work; mistakes will show up on the finished model.
7
The model will need a lot of rivets and, fortunately, Slater's produce a sheet of embossed Plastikard with lines of different sizes. I didn't bother counting them.
8
The top parts of the bridge need rivets along the edges, so I cut some 0.5mm thick plastic, place a strip of rivets along the side, wash solvent over this and push the two pieces together. The solvent softens the material and they bond very well, despite the small surface contact area.
9
A pair of bridge sides. Each consists of 94 pieces of plastic, and the pair took around seven and a half hours to build. Scratch-building isn't a quick process, but the results are very satisfying.
10
Obviously, the bridge needs supports and it's not possible to get close enough to wield a tape measure properly. Fortunately, counting the bricks gives a reasonable guide to sizes if you have a clear photo allowing me to chop up sheets of 2mm Plastikard until they looked about right.
11
Wrapping the carcass in Wills embossed brick sheet means dealing with corners. Some can only be handled by butt joints. For accuracy, I overlap the corner and then trim it back once the glue has dried. It's worth leaving this overnight to go really hard or it can move when you cut or sand it.
12
Some corners can be formed by scoring the back of the plastic with an Olfa cutter and carefully bending it between your fingers. This works better for less sharp corners, but right angles are possible.
13
Under the bridge are more strips of rivets from the Slater's sheet, stuck to the wood with all-purpose glue and bonded at the ends with solvent.
14
Until the 1980s, the bridge was used for advertising. Originally large letters for 'Dares Ales' were hung on a framework, but these were later replaced with a banner. The supports for this are difficult to see in photos, so I made the best guess from the plastic angle. It will be hidden eventually, so I don't need perfection, just something that looks right. That's another 12 pieces of plastic for each side.
15
There's a lot more to do on the layout, but the bridge can be positioned over the road. Rapido's Brummie bus clears the bottom by about 2ft – exactly like the current double-deckers do today.
Content continues after advertisements
Canal Bridge
1
This is my prototype. To be honest, very little of it dates back to the time I'm modelling, probably just the blue bricks on the left. No-one seemed to take pictures of it either, or at least none I can find, so I have plenty of freedom with the design of the model.
2
Bachmann's 44-152 Railway Road Over Bridge looks like it will be about the right size, although the road needs to be considerably wider. It's a nice, detailed model, made of resin with lovely, fine etched handrails.
3
The model is really clever in that it's supplied in pieces to allow the modeller to adjust the angle road and rail cross each other. This ought to make kit-bashing a lot easier.
4
I don't like to make a model structural if possible, so a couple of lengths of 25mm square wood will actually support the road. 6ft of clearance under the bridge seems about right, I had to stoop to walk under it and I'm 6ft 3ins.
5
Assembling the Bachmann parts around the supports, they had to be reduced in height and made a lot wider. Brick Plastikard, fixed with superglue, covers the gaps with more of the sheet to provide the supports.
6
All the walls around the bridge are cut from 3mm thick sheet and covered with embossed Plastikard. Detail is provided by extra strips of bricks stuck to the surface.
7
Once painted up, the result looks fine, but if I'm honest, this wasn't the best choice of kit to start with. Scratch-building would have been much quicker for the supports, even though the supplied bridge sides are very nice. A lesson learned.
More information
If you enjoyed this practical feature, you'll find a whole host of great practical advice and step-by-step guides in our Techniques section here.
Related articles
How to build your first Metcalfe card kit
How to make realistic shop windows
How to build a laser-cut signal box kit
Model Railways: Building Card Kits – Top Tips
Your weekly World of Railways newsletter
Are you subscribed to our weekly email newsletter? Don't miss the latest news, reviews, modelling advice and competitions.